
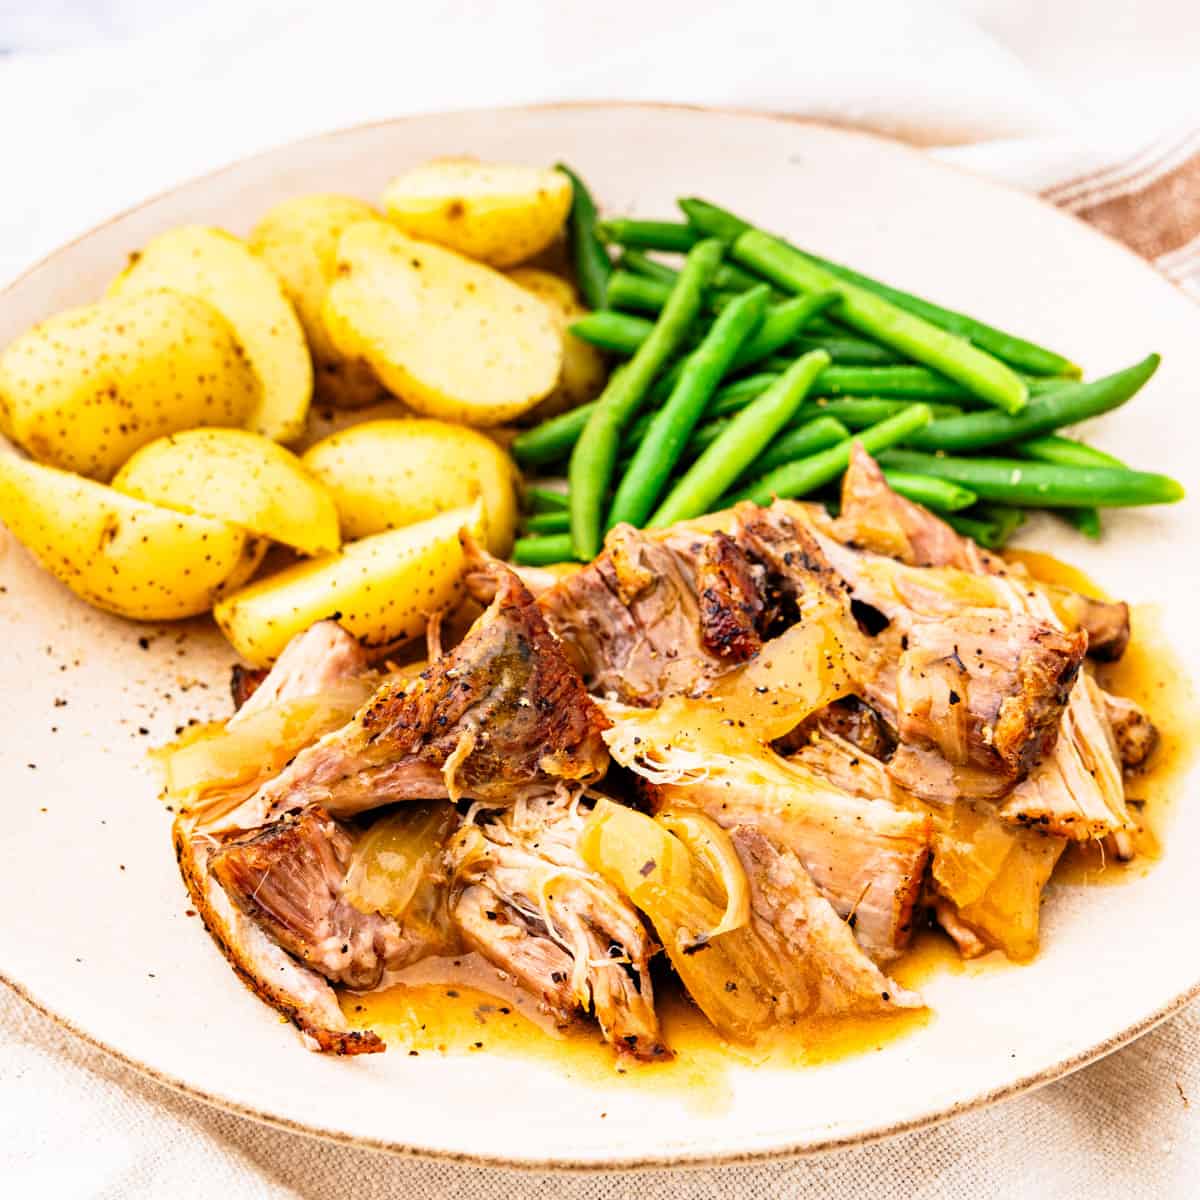
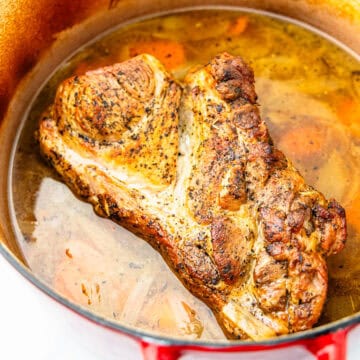
This Dutch oven braised pork shoulder is my go-to Sunday dinner once the weather turns cool. A boneless pork shoulder gets a deep golden sear, then braises low and slow with onion, carrot, garlic, and fresh herbs until it pulls apart into tender, juicy chunks.
The best part is the gravy! The braising liquid turns into a rich pan gravy in just a couple of minutes, so you get a cozy, budget-friendly dinner with very little hands-on work.
Quick Look
- Time: About 3 hours 45 minutes total, with roughly 15 minutes of hands-on work
- Key ingredients: Boneless pork shoulder, onion, carrot, garlic, fresh thyme and rosemary, and chicken stock
- Flavor: Savory and herby, with a rich pan gravy made from the braising liquid
- Method: Seared on the stovetop, then braised in a covered Dutch oven at 325°F until fork-tender
- Serve with: Mashed potatoes, green beans, or a fall salad
- Make-ahead: Reheats beautifully the next day, keeps 4 days in the fridge, and freezes for up to 3 months
Pork shoulder is one of the most affordable cuts at the store, and braising is the best thing you can do with it! The low oven slowly breaks down all that connective tissue, so a cut that would be tough on the grill turns fall-apart tender. And because everything happens in one Dutch oven, the pot you braise in is the pot you make the gravy in.
If you make it, I'd love to hear how it turns out! Please leave a star rating and a comment at the bottom of the post. Your ratings help other readers find the recipe.
Why this Recipe Works
- A sear before braising - Browning the roast on every side builds a deep, roasted flavor that ends up in both the pork and the gravy.
- A slow cook and covered Dutch oven - The liquid stays at a gentle simmer, so the connective tissue melts slowly, and the meat stays juicy instead of drying out.
- Stock instead of broth - Chicken stock is more concentrated than broth, so the braising liquid has enough body to turn into a flavorful gravy.
- Flavorful gravy from the braising liquid - The vegetables, garlic, and herbs flavor the liquid for hours, so all it needs at the end is a quick cornstarch slurry.
Pork Shoulder vs. Pork Butt
You'll see both names at the store, and they come from the same place: the pig's front shoulder. Pork butt, also called Boston butt, is cut from the upper part of the shoulder and has more marbling. The cut labeled pork shoulder (sometimes called picnic shoulder) comes from lower on the leg and is a little leaner.
Both work in this recipe and braise the same way. I use a boneless roast because it sears evenly on every side and breaks into neat chunks for serving. Whether your store labels it pork shoulder roast or Boston butt, you'll get tender, juicy results.
Ingredient Notes
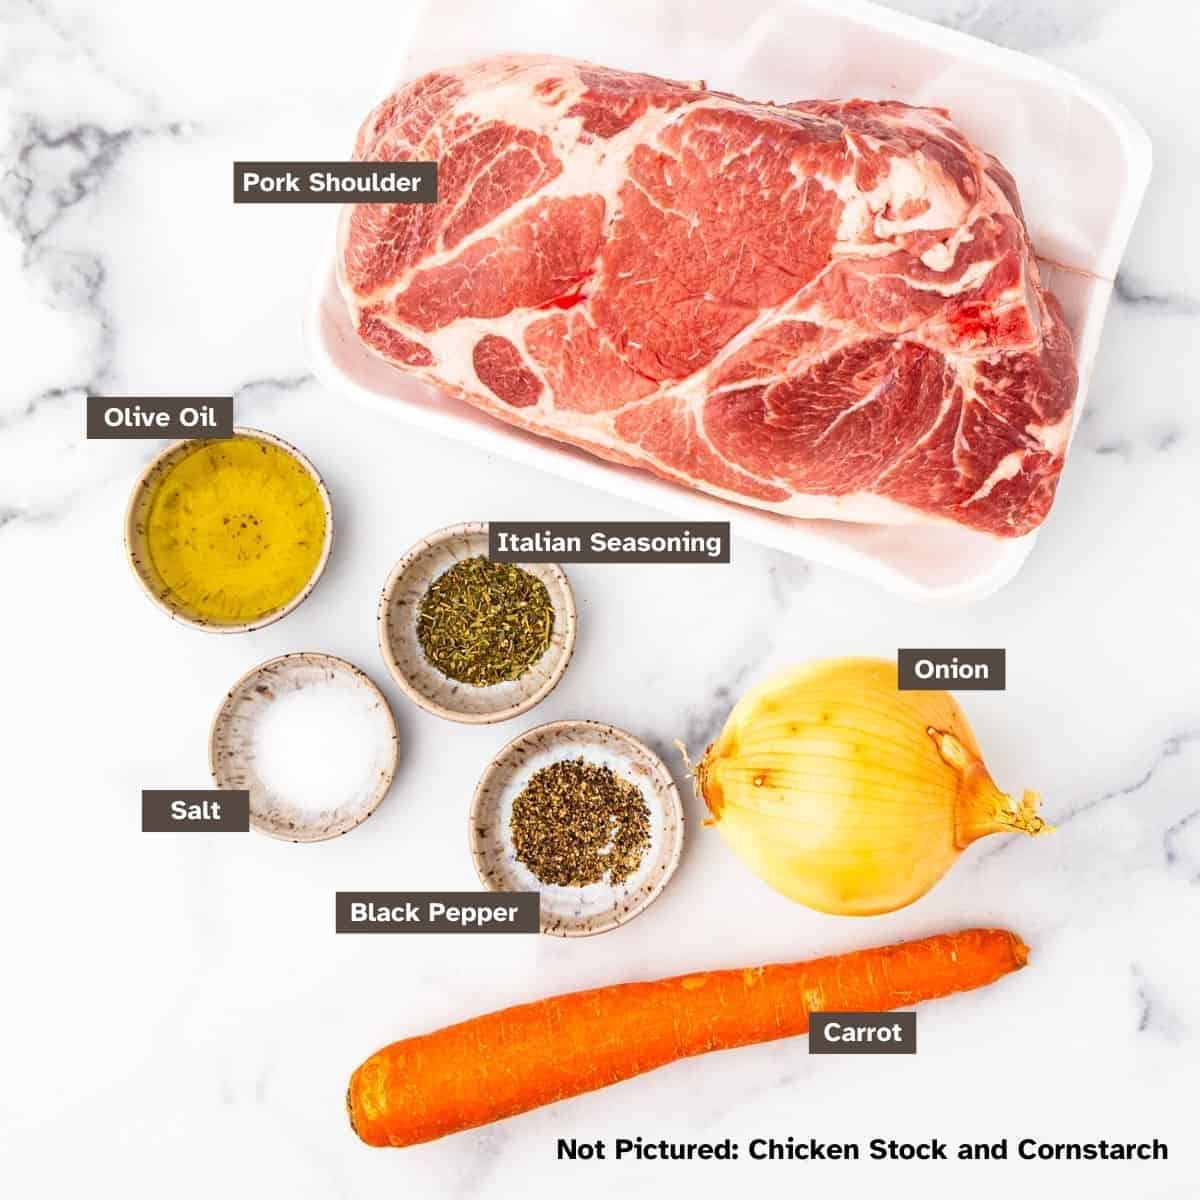
- Pork shoulder: I use a boneless pork shoulder roast, about 4 pounds. Look for one with good marbling running through the meat.
- Chicken stock: I use Swanson Low Sodium or Unsalted Chicken Stock. The liquid reduces into gravy, so starting low on salt keeps the final dish from getting too salty.
- Onion, carrot, and garlic: A rough chop is fine since they come out before you make the gravy. Leave the onions in if you like a chunkier gravy. Smash the garlic cloves with the side of your knife so they release more flavor.
- Fresh thyme and rosemary: The whole sprigs go right into the pot, and most of the leaves fall off as it braises. Fish out the stems before making the gravy. Dried herbs will work too. Swap in 1 teaspoon of dried thyme and 1 teaspoon of dried rosemary.
See the recipe card at the bottom of this post for the complete list of ingredients and measurements.
How to Make Braised Pork Shoulder
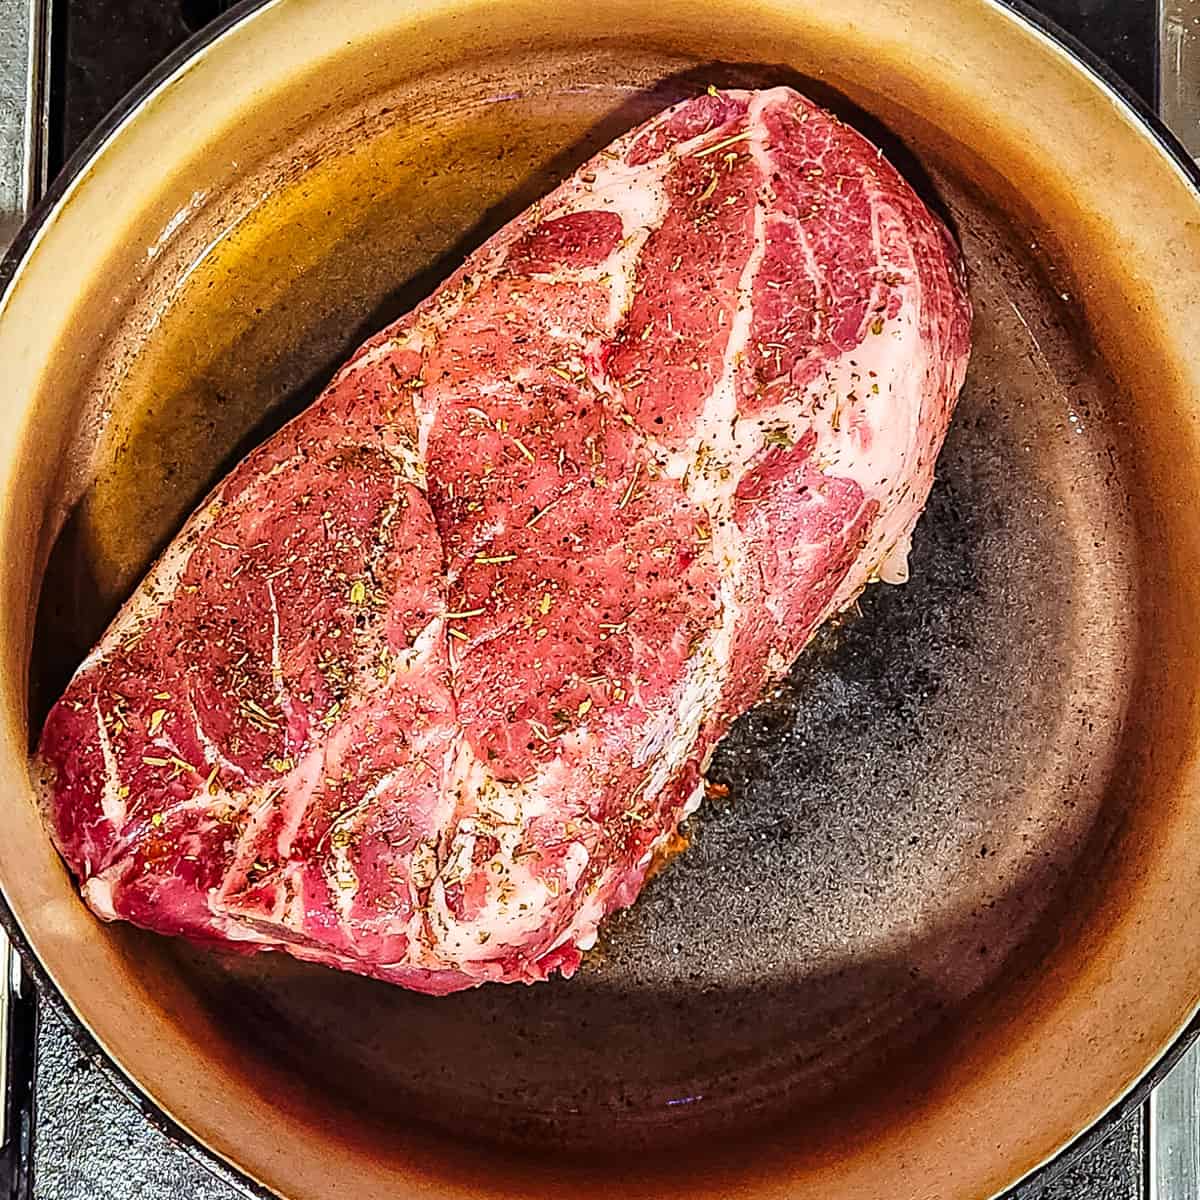
- Season the pork: Pat the roast dry with paper towels before seasoning. A dry surface browns, while a wet one steams.
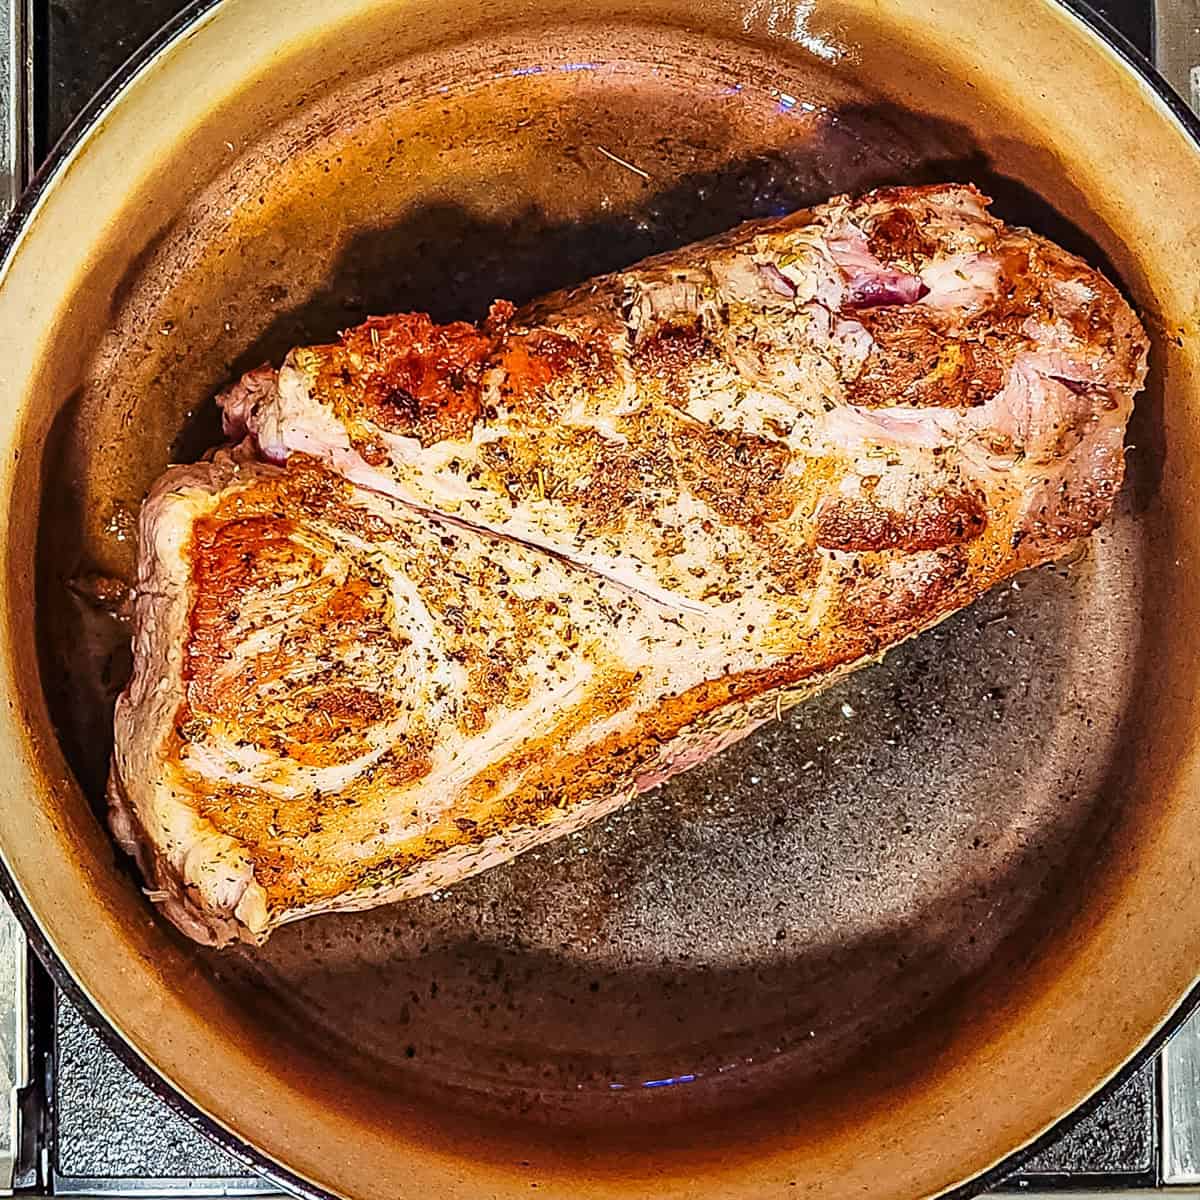
- Sear the roast: Let the pot get fully hot before the pork goes in, and don't move it until it releases easily. You're looking for a deep golden-brown crust on every side, ends included. If it sticks, give it another 30 seconds.
- Cook the vegetables: As the onion softens, it picks up the browned bits from the bottom of the pot. The garlic only needs the last minute.
- Add the stock and herbs: Scrape the bottom of the pot as you pour in the stock so nothing scorches in the oven. The liquid should come partway up the sides of the roast without covering it. That's what makes it a braise instead of a boil.
- Braise in the oven: Keep the lid on the whole time. The pork is done at 190 to 195°F, when a fork twists into it easily and it breaks apart into chunks.
- Rest the pork: It will probably fall apart as you move it to the plate, and that's okay! Resting gives the juices time to settle back into the meat.
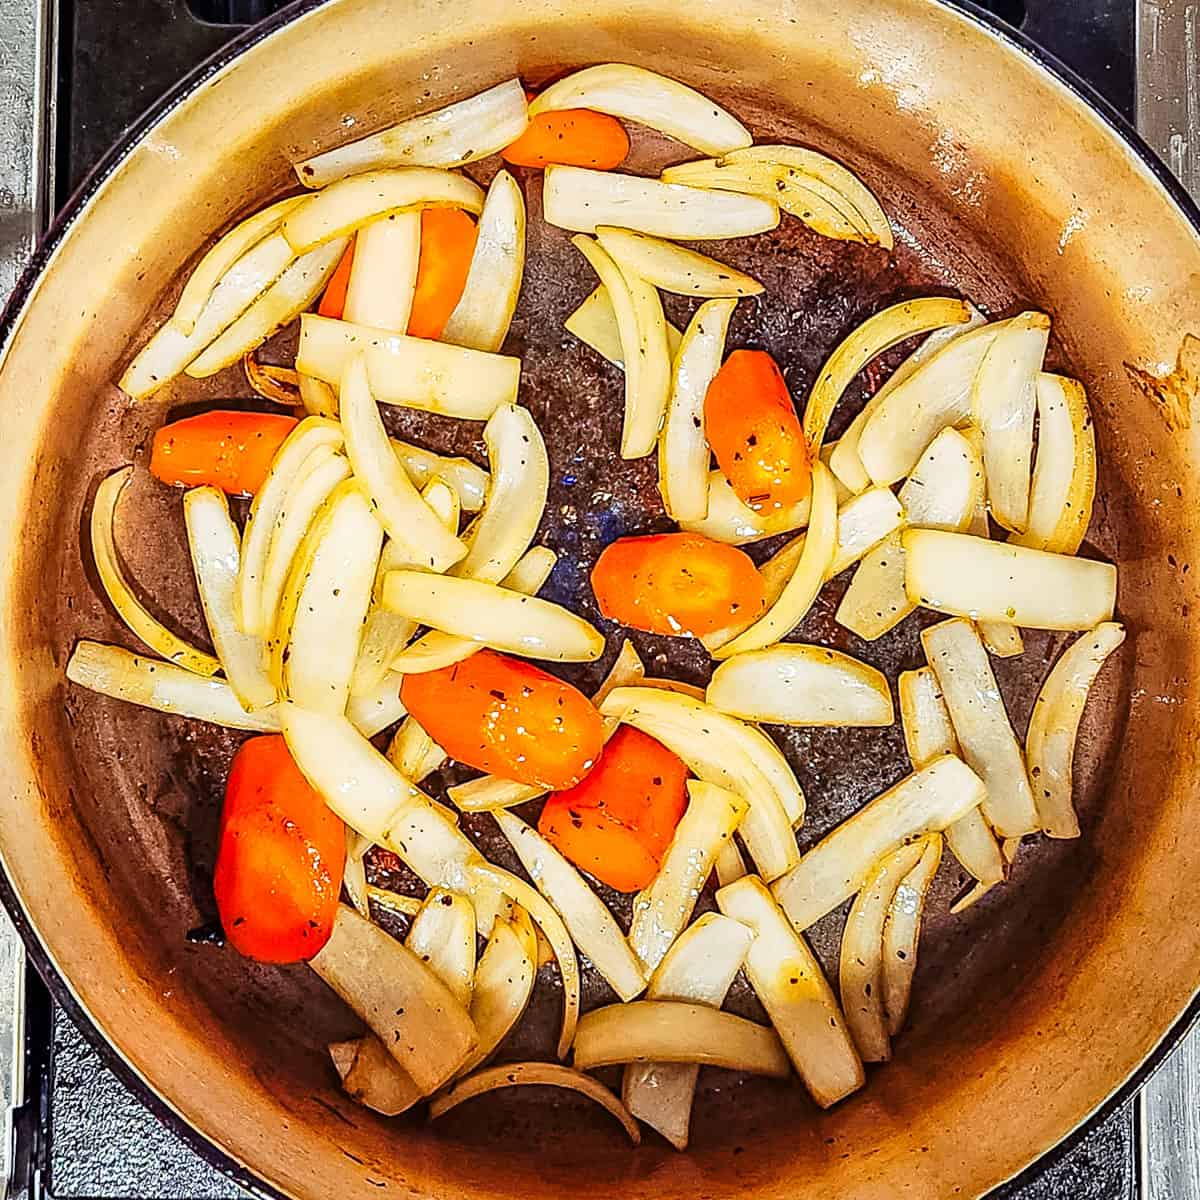
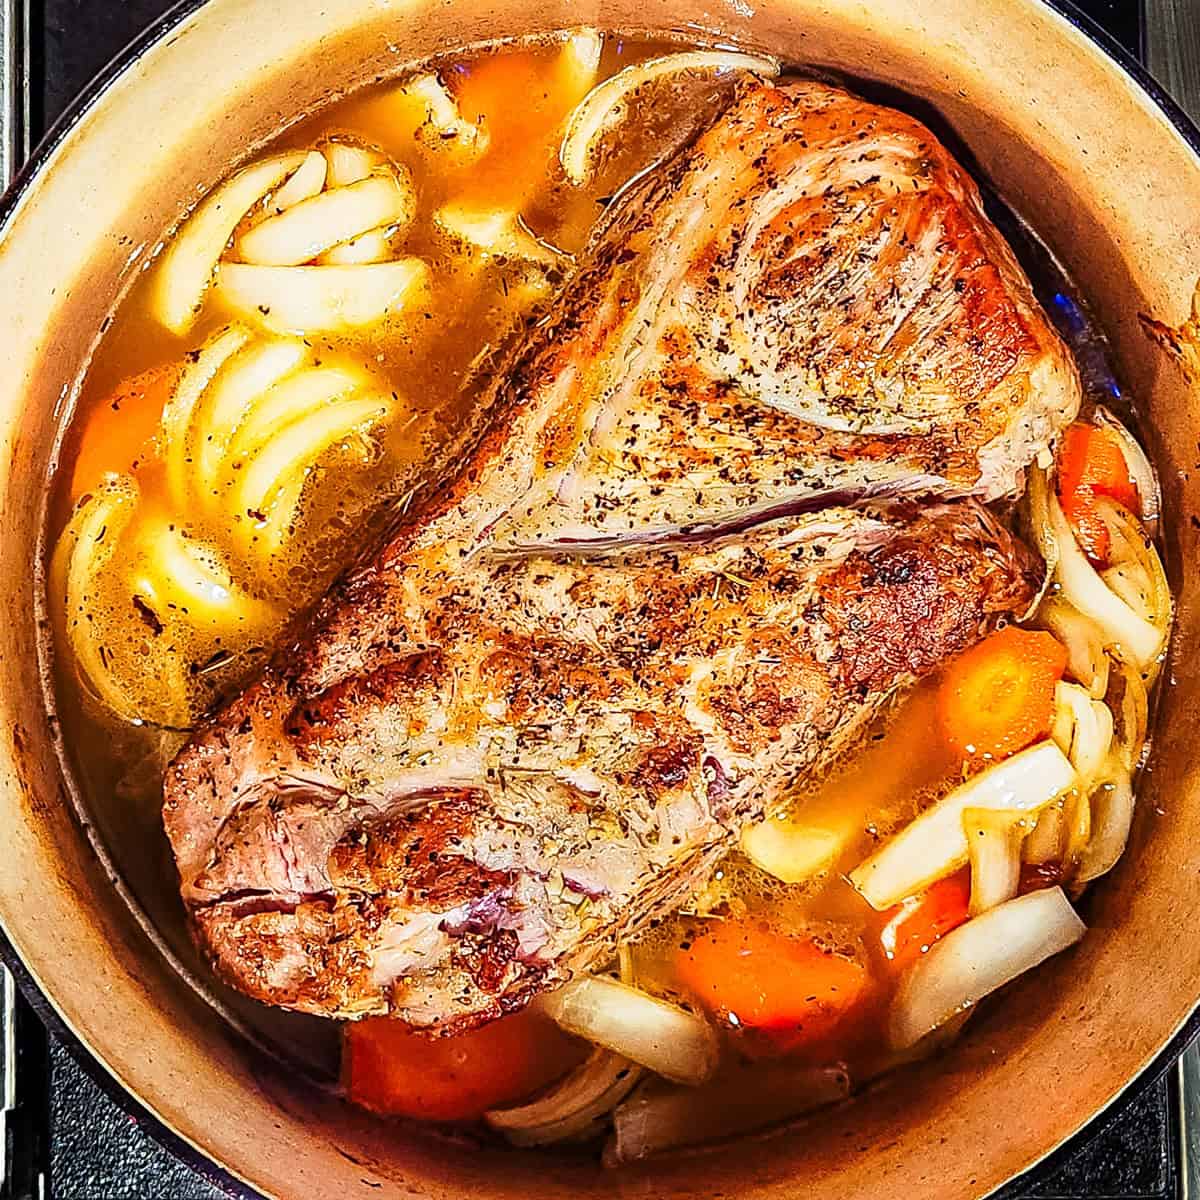
- Make the gravy: Skim off as much fat as you can before adding the slurry. A large spoon works, or use a fat separator if you have one. Whisk as it comes to a simmer, and it'll go from thin to glossy in a minute or two. For a thicker gravy, stir in more cornstarch slurry.
Expert Tips
- Trim the fat cap: If your roast has a thick layer of fat on top, trim it away before browning. Otherwise most of it ends up in the braising liquid, and you'll have a lot more skimming to do before the gravy.
- Use the right size pot: A 7 to 7½-quart Dutch oven gives a 4-pound roast room to sear without crowding and keeps the liquid at the right level.
- Trust a thermometer: A fork test works, but an instant-read thermometer in the thickest part of the roast takes out the guesswork.
- Flavor boost: You can replace ¼ cup of the chicken stock with a dry white wine to add more depth to the gravy.
What to Serve with Braised Pork Roast
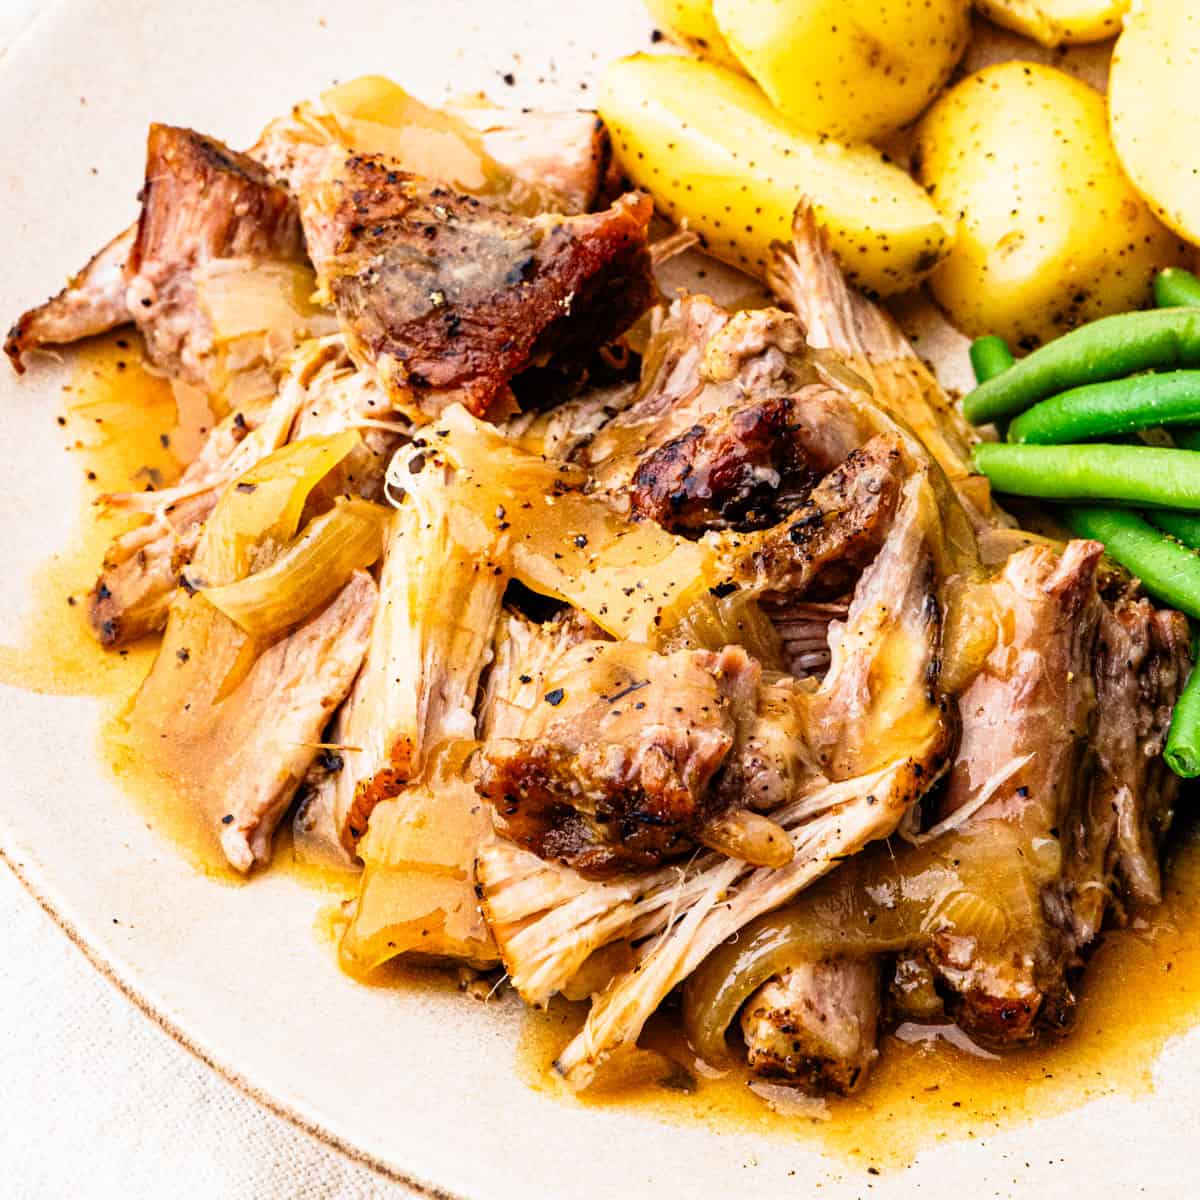
This slow-cooked Dutch oven pork roast is perfect for a cozy fall or winter meal. My apple walnut salad with apple cider vinaigrette is a perfect way to start the meal.
A starchy side dish like my Instant Pot garlic mashed potatoes is a must to soak up the flavorful gravy.
A simple green veggie, like my roasted Brussels sprouts or garlic-butter green beans, is perfect for rounding out the meal.
Roasted baby potatoes and maple-glazed carrots are also great options.
Make-Ahead Tips
This is a great one to make a day ahead! I've tested it, and the reheated pork is excellent. Let the pork cool in its braising liquid, then cover and refrigerate it overnight. The next day, lift off the fat that hardens on top, rewarm the pork in the liquid in a 325°F oven until heated through, then make the gravy on the stovetop as usual.
Storage and Reheating
Store leftovers in an airtight container in the fridge for up to 4 days. Reheat in a 325°F oven for about 10-15 minutes, or until warmed through. Smaller portions can go in the microwave. Leftover pork is great in tacos or sandwiches too!
Freezing
Freeze the cooked pork in an airtight container for up to 3 months. Adding some of the gravy or braising liquid to the container keeps it from drying out. Thaw it overnight in the fridge before reheating.
Substitutions & Variations
- Make it a one-pot meal: Add baby potatoes and extra carrots to the pot for the last hour of cooking. I've tested this, and the vegetables soak up all the flavor from the braising liquid.
- White wine: Replace ¼ cup of the chicken stock with a dry white wine for more depth in the gravy.
- Apple cider: Swap up to 1 cup of the stock for apple cider and add a sliced apple to the pot for a sweeter fall version.
- Dried herbs: No fresh herbs? Use 1 teaspoon of dried thyme and ½ teaspoon of dried rosemary instead.
More Fall Comfort Food Recipes


📖 Recipe
Dutch Oven Braised Pork Shoulder
Equipment
Ingredients
- 4 pound Pork Shoulder Roast
- 1 teaspoon Kosher salt
- 1 teaspoon Italian seasoning
- ½ teaspoon freshly ground black pepper
- 2 Tablespoons olive oil
- 1 medium yellow onion, roughly chopped
- 3 cloves garlic, smashed
- 1 large carrot, cut into 1-inch pieces
- 2 cups low-sodium or unsalted chicken stock
- 3 sprigs fresh thyme
- 2 sprigs fresh rosemary
For the Gravy
- 1 Tablespoon corn starch
- 2 Tablespoons water
Instructions
- Preheat the oven to 325°F. Heat a large Dutch oven over medium-high heat. While it heats, pat the pork dry and season it all over with the Italian seasoning, salt, and pepper.
- Add 1 tablespoon of the oil to the pot and sear the roast for about 2 minutes per side, until browned on all sides. Transfer it to a plate.
- Add the remaining tablespoon of oil, then the onion and carrot. Cook for 3 to 4 minutes, stirring occasionally, until softened, adding the garlic for the last minute.
- Pour in the stock and scrape up the browned bits from the bottom of the pot. Return the pork to the pot and tuck the thyme and rosemary sprigs around it.
- Cover and braise in the oven for about 3 hours, until the pork reaches 190 to 195°F and pulls apart into chunks easily with a fork.
- Transfer the pork to a plate, tent with foil, and let it rest for 15 minutes.
For the gravy
- Return the Dutch oven to the stovetop over medium-high heat. Remove the vegetables and herb stems with a slotted spoon, and skim most of the fat from the top of the liquid.
- Mix the cornstarch and water, then whisk it into the pot. Bring to a simmer and cook for 1 to 2 minutes, until thickened.
- Break the pork into chunks and serve with the gravy.
Notes
- The pork is done at 190 to 195°F, when it pulls apart into chunks easily with a fork. A bone-in roast or pork butt works too; go by temperature, not the clock.
- For a thicker gravy, whisk in another tablespoon of cornstarch mixed with 2 tablespoons of cold water.
- One-pot option: add baby potatoes and extra carrots for the last hour of cooking.
- For more depth, replace ¼ cup of the stock with dry white wine.
- Make ahead: cool the pork in its braising liquid and refrigerate overnight. Lift off the fat, rewarm covered in a 325°F oven, then make the gravy.
- Store leftovers in an airtight container in the fridge for up to 4 days, or freeze for up to 3 months. Reheat in a 325°F oven for about 10-15 minutes, or microwave smaller portions.
Nutrition
* All nutrition information we provide are estimates based on third party calculators. We encourage you to calculate these on your own for accurate results.


Leave a Reply