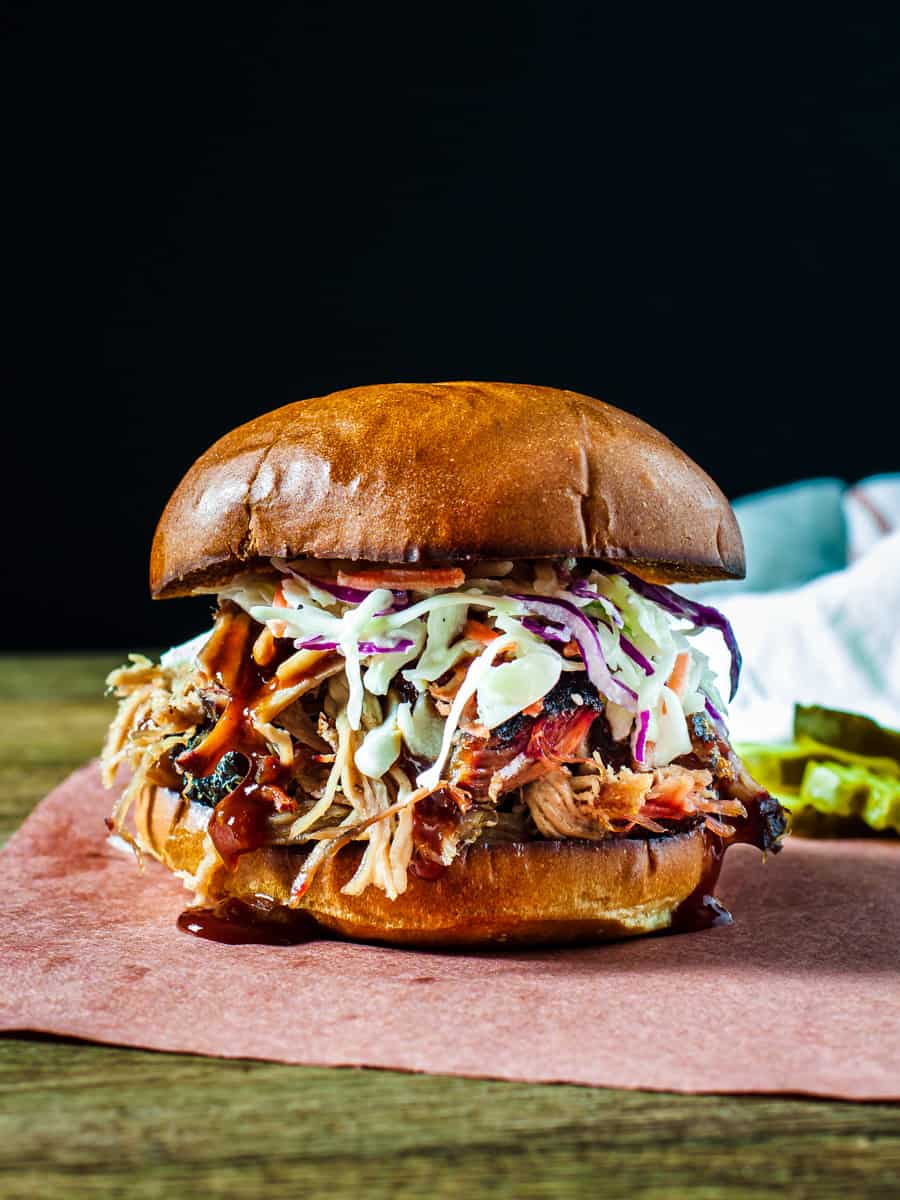
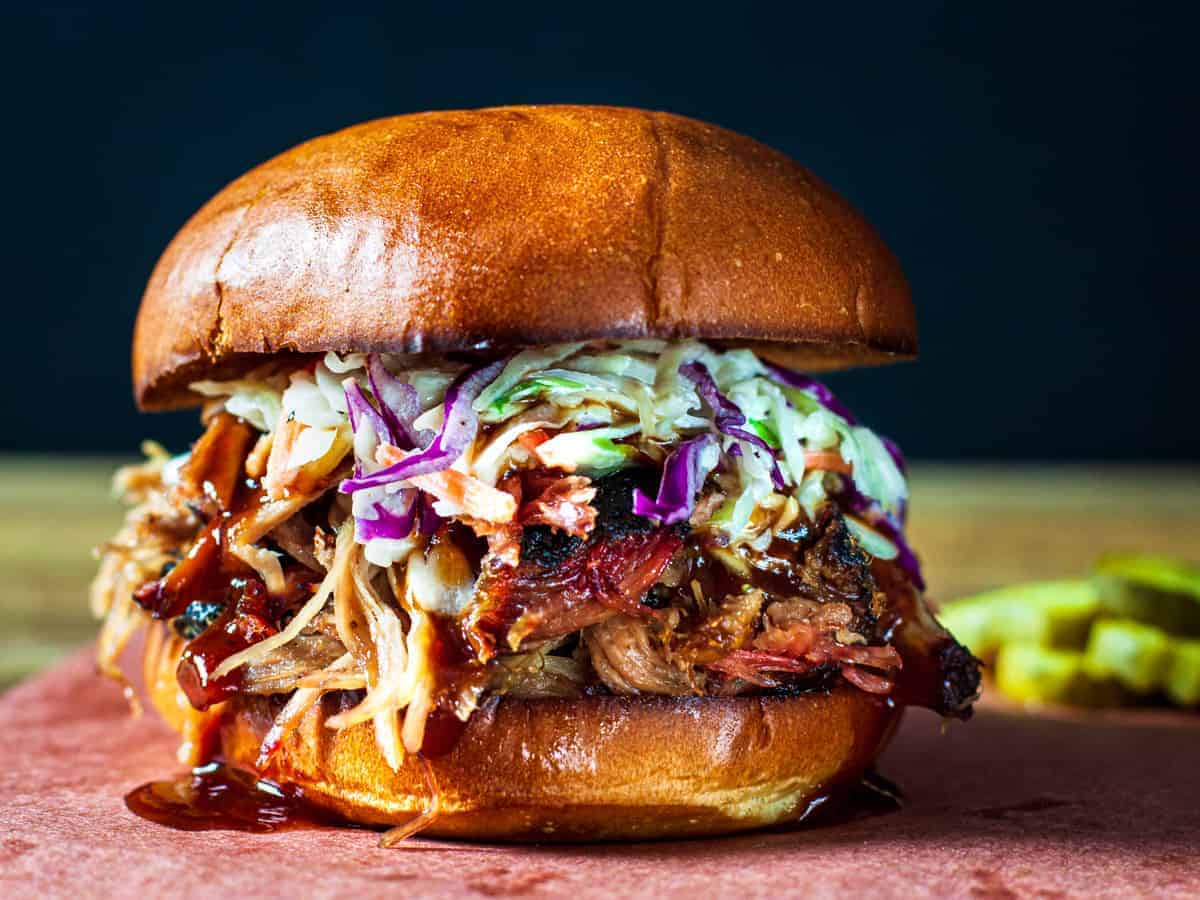
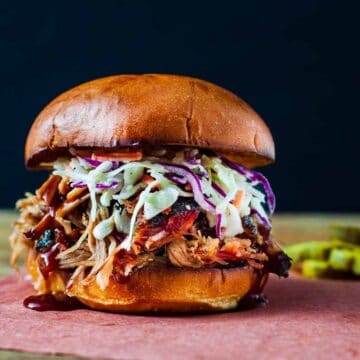
This Smoked Pulled Pork Barbecue is cooked low and slow until the pork butt is tender, juicy, smoky, and easy to shred. It takes some time, but most of that time is hands-off, and the result is perfect for sandwiches, BBQ plates, game days, summer cookouts, and holiday weekends.
If you're new to smoking meat, pork butt is one of the best cuts to start with. It is affordable, forgiving, full of marbling, and tough to mess up as long as you give it enough time to cook and rest.
In this post, I'll walk you through the best cut of pork to use, how to season it, when to wrap it, how to handle the stall, and how to know when your smoked pulled pork is ready to shred.
Jump to:
- Quick Look
- Why This Recipe Works
- What Cut of Pork is Best for Pulled Pork?
- How Much Pulled Pork Do I Need Per Person?
- Ingredient Notes
- How to Prep a Pork Butt Before Smoking
- What Wood is Best for Smoking Pulled Pork?
- What if I'm Using a Pellet Grill?
- How to Smoke Pulled Pork
- What is the Stall?
- Pulled Pork Temperature and Timing
- Tips for the Best Smoked Pulled Pork
- What to Serve with Pulled Pork
- How to Store and Reheat Pulled Pork
- Smoked Pulled Pork FAQs
- 📖 Recipe
- You may also like
Quick Look
- Flavor: Smoky, savory, lightly sweet, tender barbecue pork
- Best cut: Bone-in pork butt or Boston butt
- Smoker temperature: 225°F to 250°F
- Cook time: About 1½ to 2 hours per pound
- Final temperature: 195°F to 205°F, or until probe tender
- Best wood: Hickory, apple, cherry, oak, or a mix
- Best served with: BBQ sauce, coleslaw, buns, baked beans, mac and cheese, or potato salad
Why This Recipe Works
- Pork butt is forgiving - The marbling and connective tissue slowly break down as the pork smokes, giving you tender, juicy pulled pork.
- Low and slow builds flavor - Cooking at 225°F to 250°F gives the pork time to absorb smoke and develop a flavorful bark.
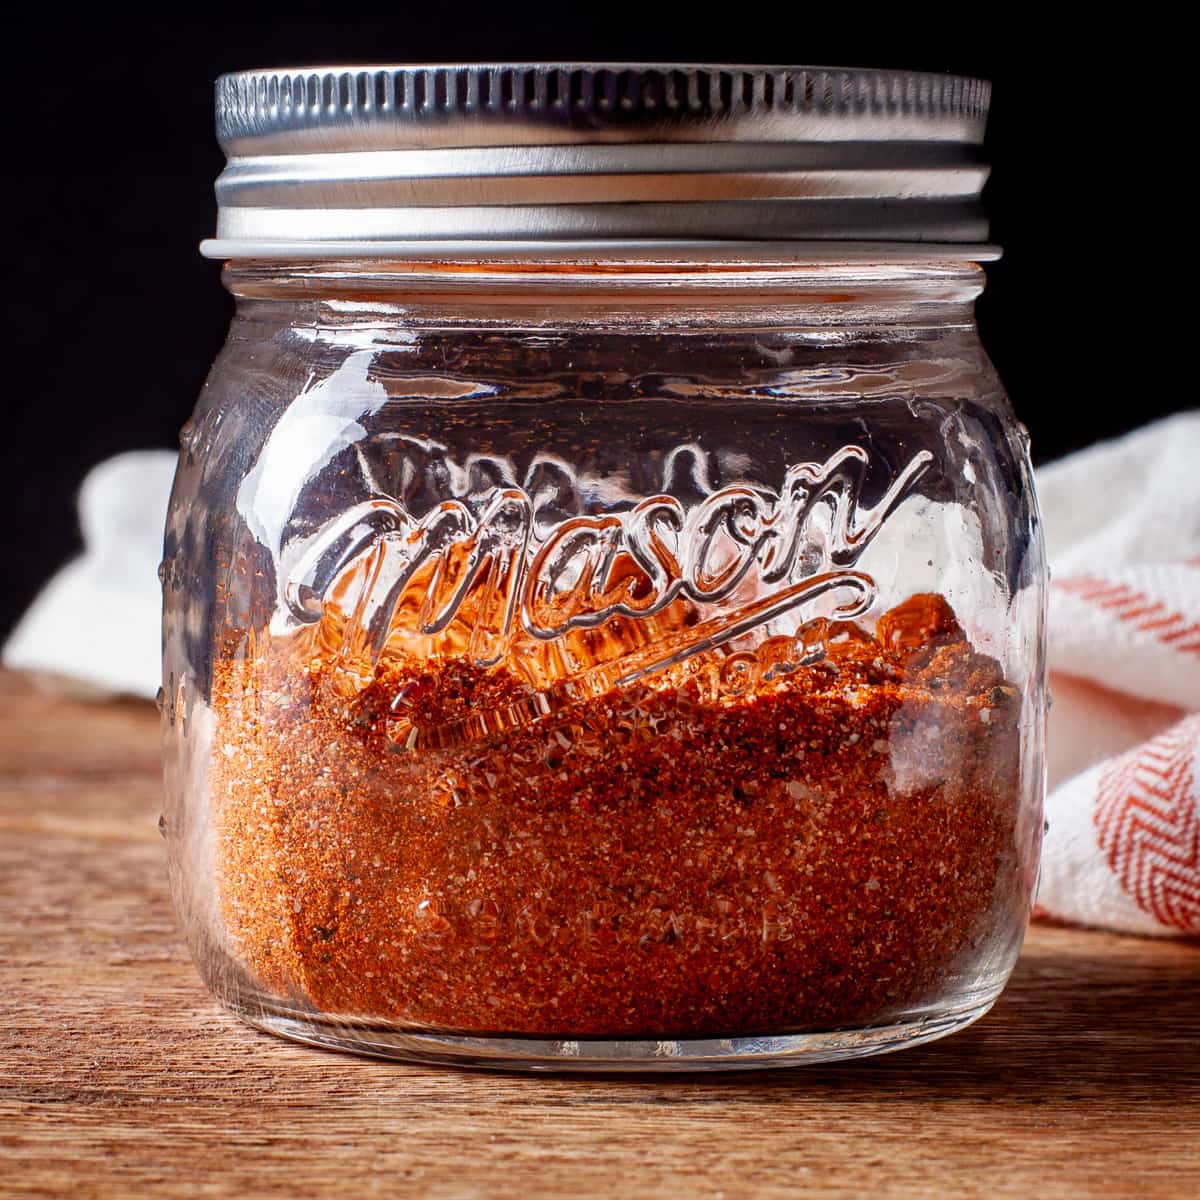
- A simple dry rub does the work - Brown sugar, paprika, salt, pepper, garlic, onion, mustard, and cayenne give the pork a sweet, savory, smoky flavor.
- Great for feeding a crowd - One pork butt makes enough for a cookout, and leftovers freeze and reheat well.
- Easy to make ahead - Smoke it the day before, shred it, save the juices, and reheat gently when you're ready to serve.
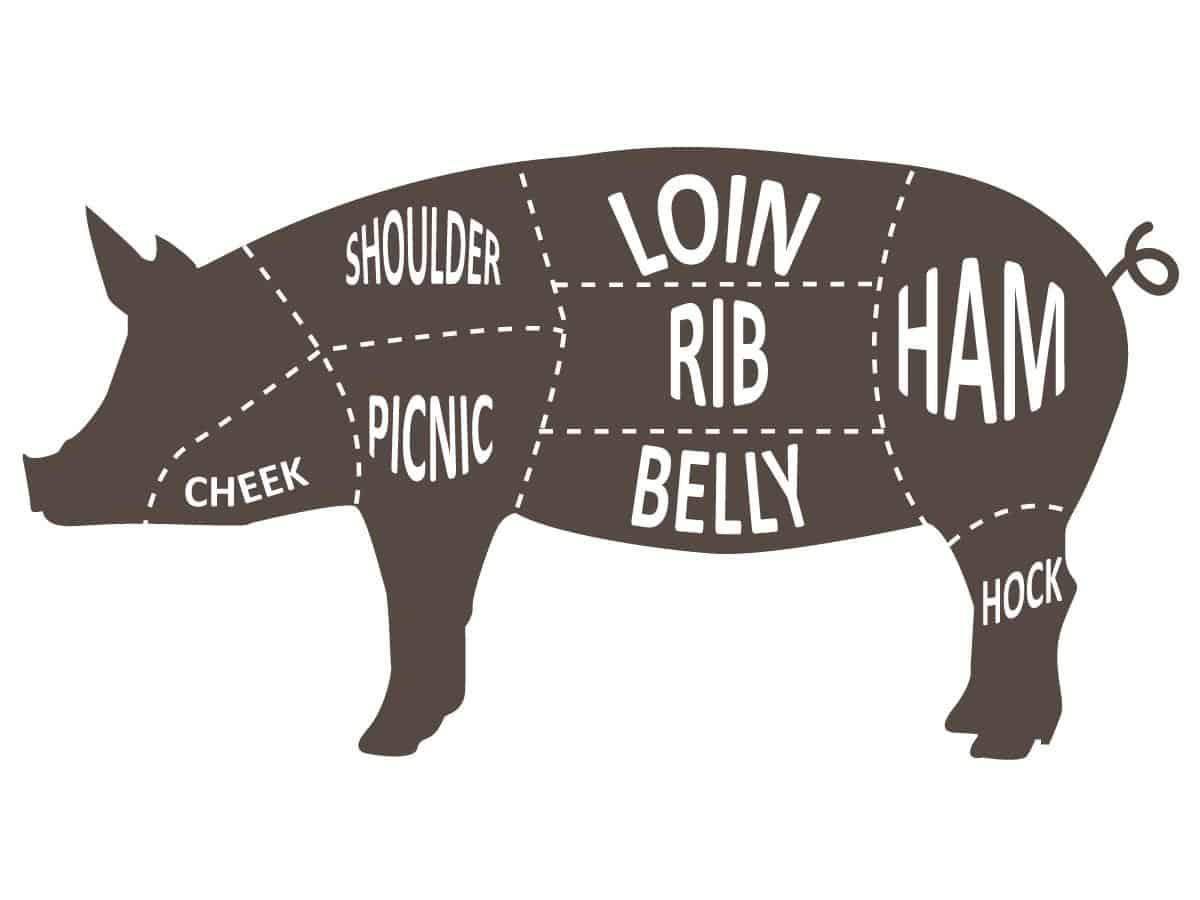
What Cut of Pork is Best for Pulled Pork?
The best cut for smoked pulled pork is pork butt, also called Boston butt. Despite the name, it comes from the upper part of the pork shoulder.
Pork butt has plenty of fat, marbling, and connective tissue, which makes it perfect for low-and-slow barbecue. As it cooks, the connective tissue breaks down and turns the meat tender enough to shred.
You may also see picnic shoulder, which comes from the lower part of the shoulder. It can be used for pulled pork, but pork butt is usually easier to cook and gives more consistent results.
For this recipe, look for a 6 to 8 pound bone-in pork butt with good marbling and a fat cap on one side.
How Much Pulled Pork Do I Need Per Person?
A good rule of thumb is to plan for about ⅓ pound of cooked pulled pork per person when serving sandwiches or a meal with several sides.
Pork butt loses a lot of weight during cooking, usually close to half of its raw weight. So if you want 4 pounds of cooked pulled pork, start with about 8 pounds of raw pork butt.
For bigger appetites or if pulled pork is the main focus of the meal, plan closer to ½ pound cooked pork per person.
Quick serving guide
- 6-pound pork butt: about 8 to 10 servings
- 8-pound pork butt: about 10 to 12 servings
- 10-pound pork butt: about 14 to 16 servings
Ingredient Notes
- Pork butt: Use a bone-in pork butt if possible. The bone helps the roast cook evenly, and it gives you a built-in doneness check. When the pork is ready, the bone should twist and pull out easily. Boneless pork butt works too, but it may cook a little faster and can have more loose pieces from where the bone was removed.
- Brown sugar: Brown sugar adds a little sweetness and helps with bark formation. It balances the salt, smoke, and spices.
- Paprika: Sweet paprika adds color and mild peppery flavor. For a deeper smoky flavor, you can use smoked paprika.
- Kosher salt: Salt seasons the pork and helps the dry brine work. If using a store-bought rub, check the salt level before adding more.
- Black pepper: Black pepper adds bite and helps balance the sweetness of the rub.
- Garlic and onion powder: These add savory background flavor that works well with pork and smoke.
- Ground mustard: Ground mustard adds a little tang and helps round out the rub. It will not make the pork taste like mustard.
- Cayenne pepper: A small amount adds gentle heat. You can increase it if you like spicier barbecue.
How to Prep a Pork Butt Before Smoking
- Trim the fat cap: Trim away any hard fat, loose flaps, or thick surface fat. I like to leave about ⅛ to ¼ inch of fat on top. A thin layer helps protect the pork, but too much fat can keep the rub from seasoning the meat and prevent good bark.
- Fat cap direction depends on your smoker: If the heat comes from below, cook the pork fat cap down to help protect the meat. If the heat comes from above or the side, fat cap up works well.
- A mustard binder is optional: You can rub the pork with a thin layer of yellow mustard before seasoning to help the rub stick. You will not really taste the mustard after smoking.
- Season ahead if possible: For the best flavor, season the pork the night before and let it rest in the fridge. This gives the salt time to work into the meat and helps build a better bark.
What Wood is Best for Smoking Pulled Pork?
A mix of hickory and applewood is my favorite for smoked pulled pork. Hickory gives the pork classic barbecue smoke flavor, while applewood adds a slightly sweeter, milder smoke.
Other good options include:
- Cherry
- Oak
- Pecan
- Maple
Avoid heavy woods like mesquite unless you use them lightly. They can overpower pork during a long smoke.
For most smokers, I prefer wood chunks over chips because they burn longer and produce cleaner smoke.
What if I'm Using a Pellet Grill?
If you're making this smoked pork butt recipe on a pellet grill, like a Traeger, you won't need wood chunks. The smoke will come from the variety of pellets that you use. Pellets are available in a wide variety of specific wood species and are also sold as blends.
Pellet grills produce a lighter amount of smoke, so if you want to add more smoke flavor, you can use a smoke tube. You fill the tube with wood chips, light one end, and place it in the smoker so it will burn and produce extra smoke during the cook.
How to Smoke Pulled Pork
- Make the rub: Add the brown sugar, paprika, kosher salt, black pepper, garlic powder, onion powder, ground mustard, and cayenne pepper to a small bowl. Stir until well combined.
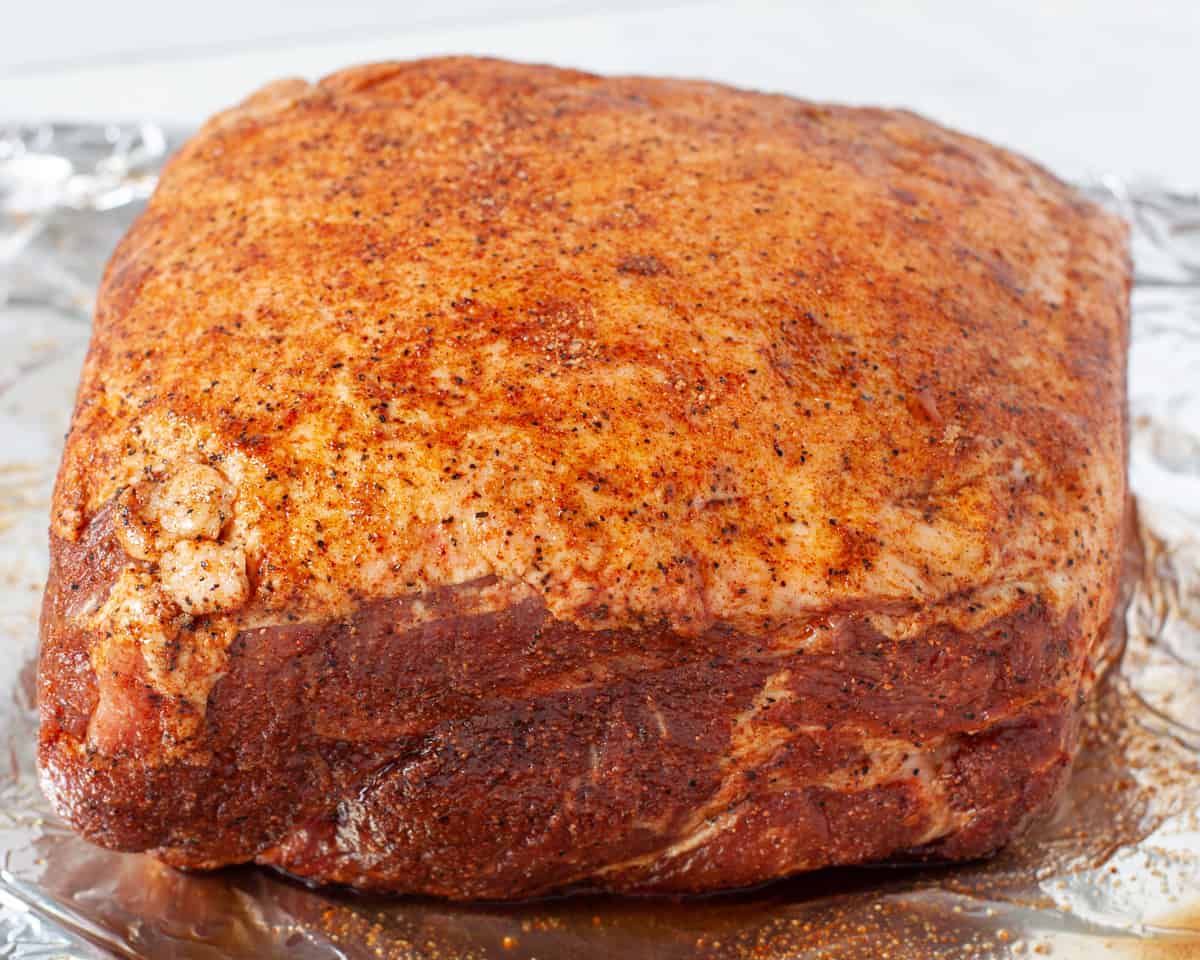
- Trim and season: Trim any thick or hard fat from the pork butt, leaving about ⅛ to ¼ inch of fat on top. Coat the pork generously with the dry rub on all sides, working the seasoning into any crevices.
- Rest the pork: For the best flavor, refrigerate the seasoned pork overnight. If you are short on time, let it sit at room temperature while you preheat the smoker.
- Preheat the smoker: Preheat your smoker to 225°F to 250°F. Add your wood chunks, chips, or pellets according to your smoker setup.
- Smoke the pork: Place the pork butt on the smoker and cook until the bark is dark and the internal temperature reaches around 160°F to 170°F.
- Wrap if desired: If you want to speed up the cook or push through the stall, wrap the pork tightly in foil or butcher paper. Return it to the smoker and continue cooking.
- Cook until tender: Keep cooking until the pork reaches about 195°F to 205°F and a thermometer probe slides in with very little resistance.
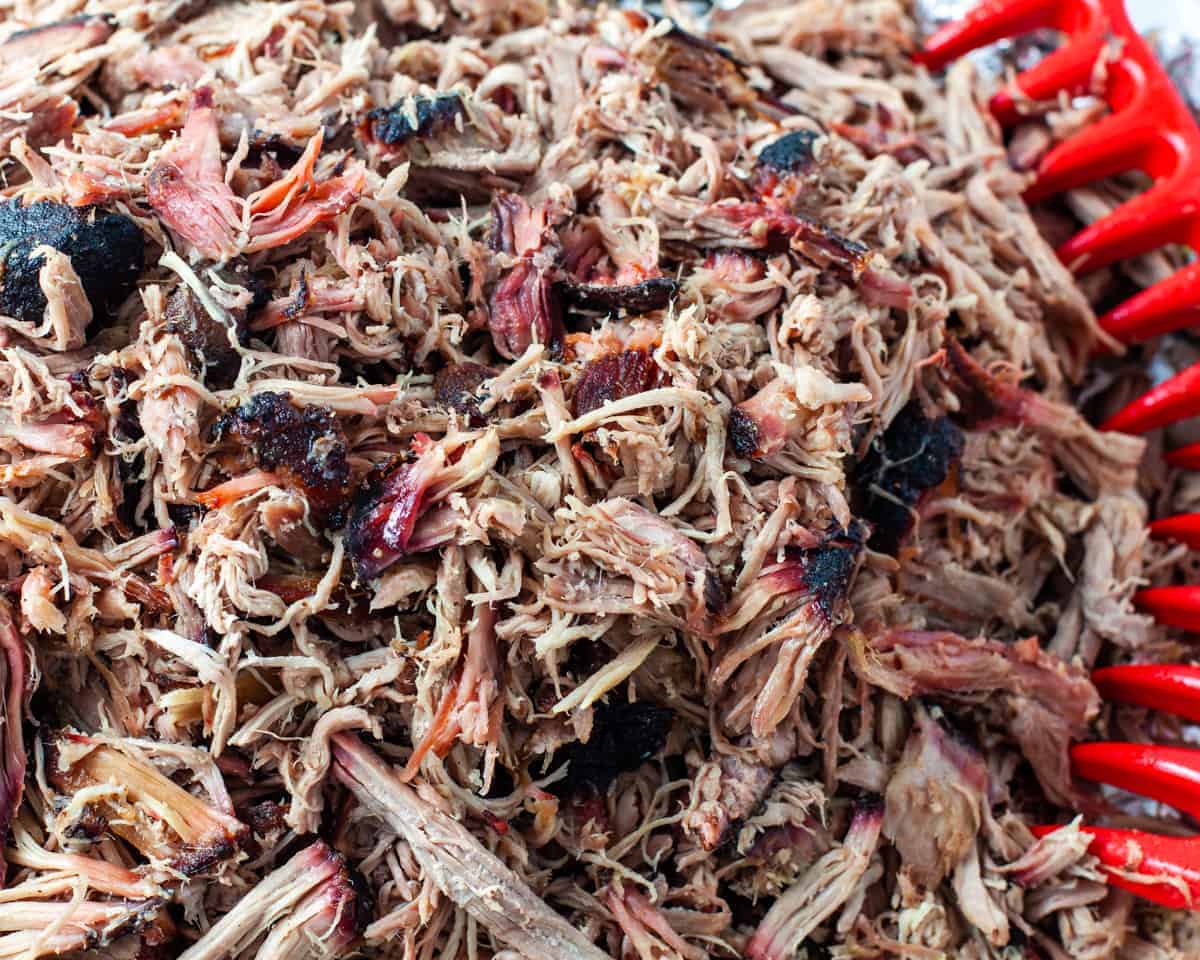
- Rest and shred: Remove the pork from the smoker and let it rest, still wrapped, for at least 30 minutes. Pull out the bone, remove any large pieces of fat or gristle, then shred the pork with forks, meat claws, or gloved hands.
What is the Stall?
The stall is the point in the cook when the internal temperature of the pork seems to stop rising, usually somewhere around 150°F to 170°F. This happens because moisture evaporates from the surface of the meat and cools it down.
Do not panic. The stall is normal.
You have two choices:
- Wait it out: Keep smoking until the pork pushes through naturally. This gives you the best bark but takes longer.
- Wrap the pork: Wrap in foil or butcher paper to speed things up. This helps the pork cook faster, but the bark may soften slightly.
If I'm cooking for guests, I usually wrap. If I have plenty of time, I let it ride.

Pulled Pork Temperature and Timing
Pulled pork is done when it is tender, not just when it hits a specific temperature.
Most pork butts are ready to shred somewhere between 195°F and 205°F. Start checking around 195°F by inserting a thermometer probe into a few different spots. It should slide in easily, almost like softened butter.
A good sign with bone-in pork butt is when the bone feels loose and pulls out cleanly.
How long does pulled pork take?
Plan on about 1½ to 2 hours per pound at 225°F to 250°F.
- 6-pound pork butt: about 9 to 12 hours
- 8-pound pork butt: about 12 to 16 hours
- 10-pound pork butt: about 15 to 20 hours
Every pork butt cooks differently, so use time as a guide and tenderness as the final test.
Tips for the Best Smoked Pulled Pork
- Cook to tenderness, not just temperature: 195°F to 205°F is a good range, but the pork is ready when it probes tender.
- Season the day before: Dry brining overnight gives the salt time to season the meat and helps build better bark.
- Use a thermometer: A leave-in thermometer makes a long cook much easier to manage.
- Do not rush the rest: Resting helps the juices settle and makes the pork easier to shred.
- Save the juices: If you wrap the pork, save any juices in the foil and mix some back into the shredded meat.
- Add sauce lightly: Good pulled pork should taste smoky and seasoned on its own. Add just enough BBQ sauce to complement it.
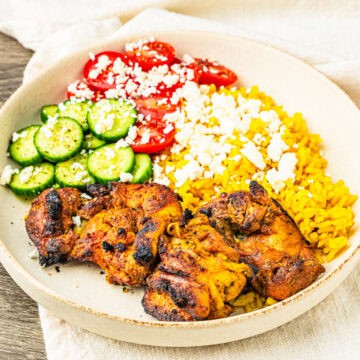
What to Serve with Pulled Pork
Pulled pork is perfect for summer cookouts, tailgates, Memorial Day, July 4th, Labor Day, and backyard BBQ dinners.
Side dishes for pulled pork
- Smoked Baked Beans
- Southern Coleslaw
- Southern Potato Salad
- Classic Baked Mac and Cheese
- Creamy Bacon Mac and Cheese
- Corn Salsa with Avocado
- Watermelon Basil Salad
BBQ Sauces
For sandwiches, pile the pulled pork onto soft buns and top with coleslaw, pickles, and your favorite BBQ sauce.
How to Store and Reheat Pulled Pork
Store leftover pulled pork in an airtight container in the refrigerator for 3 to 4 days.
For longer storage, freeze pulled pork in small portions for up to 3 months. Vacuum sealing works especially well if you have the option.
To reheat, add the pulled pork to a covered pan with a splash of apple juice, broth, water, or reserved juices. Warm in a 275°F oven until heated through. Smaller portions can be reheated in the microwave in short bursts.
Smoked Pulled Pork FAQs
Pork butt, also called Boston butt, is the best cut for pulled pork. It has enough fat and connective tissue to become tender and juicy during a long smoke.
Plan for about 1½ to 2 hours per pound at 225°F to 250°F. Always cook to tenderness, not just time.
Pulled pork is usually ready between 195°F and 205°F. It should shred easily and feel probe tender.
Wrapping is optional. It helps the pork cook faster and push through the stall, but it can soften the bark. Butcher paper preserves bark better than foil, while foil speeds things up more.
No. Mustard is only a binder to help the rub stick. You can use it, skip it, or dry brine the pork overnight instead.
Hickory and applewood are my favorite combination. Cherry, oak, pecan, and maple also work well.
Use pork butt, cook it low and slow, rest it before shredding, and mix in some reserved juices after pulling. Avoid over-saucing or reheating uncovered.
Yes. Pulled pork reheats well. Smoke it a day ahead, shred it, store it with the juices, and reheat gently before serving.

📖 Recipe
Smoked Pulled Pork Barbecue
Equipment
- Smoker
Ingredients
- 6 pound pork butt, aka"Boston butt"
Rub Ingredients
- 2 tablespoons brown sugar
- 2 tablespoons sweet paprika
- 2 tablespoons kosher salt
- 1 tablespoons black pepper
- 1 teaspoon garlic powder
- 1 teaspoon onion powder
- ½ teaspoon ground mustard
- ¼ teaspoon cayenne pepper
Instructions
- Make the rub: Add the brown sugar, paprika, salt, pepper, garlic powder, onion powder, ground mustard, and cayenne pepper to a small bowl and stir to combine.
- Trim the pork: Trim any large pieces of hard fat from the pork butt and trim the fat cap to about ⅛ to ¼ inch thick.
- Season the pork: Coat the pork generously with the dry rub on all sides, working the seasoning into any crevices. For the best flavor, refrigerate overnight.
- Preheat the smoker: Preheat your smoker to 225°F to 250°F. Add wood chunks, chips, or pellets according to your smoker setup.
- Smoke the pork: Place the pork butt on the smoker with the fat cap facing up or toward the heat source. Smoke until the bark is dark and the internal temperature reaches about 160°F to 170°F.
- Wrap if desired: Wrap the pork tightly in foil or butcher paper if you want to speed up the cook. Return it to the smoker and continue cooking.
- Cook until tender: Continue cooking until the pork reaches about 195°F to 205°F and a probe slides into the meat with little resistance.
- Rest the pork: Remove the pork from the smoker and let it rest, wrapped, for at least 30 minutes. For a longer rest, place it in a dry cooler with towels.
- Shred and serve: Pull the pork into large pieces, remove the bone and any gristle, then shred with forks, meat claws, or gloved hands. Mix with reserved juices or BBQ sauce if desired.
Notes
Notes
- Pork butt and Boston butt are the same cut and are best for pulled pork.
- Cook time varies by size, smoker temperature, weather, and whether you wrap the pork.
- The pork is done when it is tender, usually between 195°F and 205°F.
- Save the juices from the foil and mix some back into the shredded pork.
- Store leftovers in the refrigerator for 3 to 4 days or freeze for up to 3 months.
- If using a store-bought rub, check the salt level before adding extra salt.
Nutrition
* All nutrition information we provide are estimates based on third party calculators. We encourage you to calculate these on your own for accurate results.


John Pitcher says
Great recipe! I refrigerated the pork butt for a little over 24 hours after applying the rub. I wrapped it in plastic and put it in a half pan.
I used half and half apple wood and hickory as recommended. I was using a CharBroil electric smoker with a temp probe. 8 pound butt took about 14 hours to reach 200 degrees internally.
cmsammut@icloud.com says
Yummy! Thank you for sharing the science and your art!