This Instant Pot Brisket is tender and juicy and cooks in just 90 minutes! It's a flavorful meal with delicious barbecue brisket flavor in a fraction of the time. In this post, I'll provide simple step-by-step instructions, expert tips, and answer some common FAQs to help you make this brisket recipe perfectly every time!

Jump to:
Why this Recipe Works
Beef Brisket comes from the chest area of the cow and is a tough, hard-working muscle. This cut of meat normally requires hours of braising or smoking to become tender. But cooking brisket in a pressure cooker results in tender, melt in your mouth meat in just 90 minutes. It's loaded with flavor and is a delicious dinner the whole family will love!
- Tender and Juicy - Pressure cooking brisket in a mixture of barbecue sauce and beef stock results in tender, juicy meat.
- Easy, hands-off recipe - This instant pot brisket recipe only requires around 10 minutes of active time, so it's perfect for an easy, no-fuss dinner.
- One Pot - Using an Instant Pot allows you to sear the meat and pressure cook it all in the same pot, so clean-up is a breeze.
Ingredient Notes
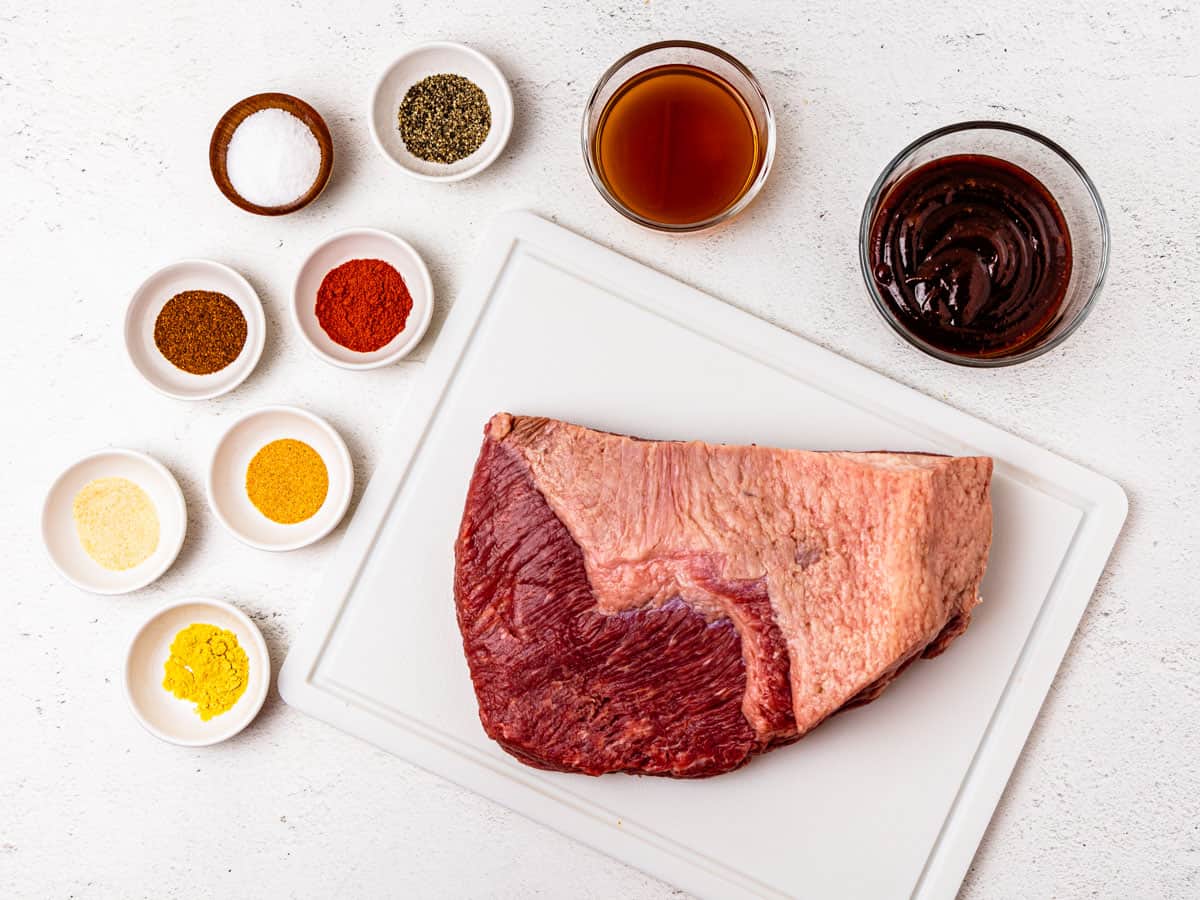
- Brisket Flat - The brisket flat cut is the thinner, leaner portion of a whole brisket. Aim for a piece around 3-4 pounds, and look for a shape that will approximately fit your Instant Pot. It's okay if it's a little tight since it will shrink as it cooks. Most briskets will have a fat cap on one side, which is perfect for keeping the meat moist when smoking, but it's not needed when pressure cooking brisket, so look for a piece that is well-marbled but not too fatty.
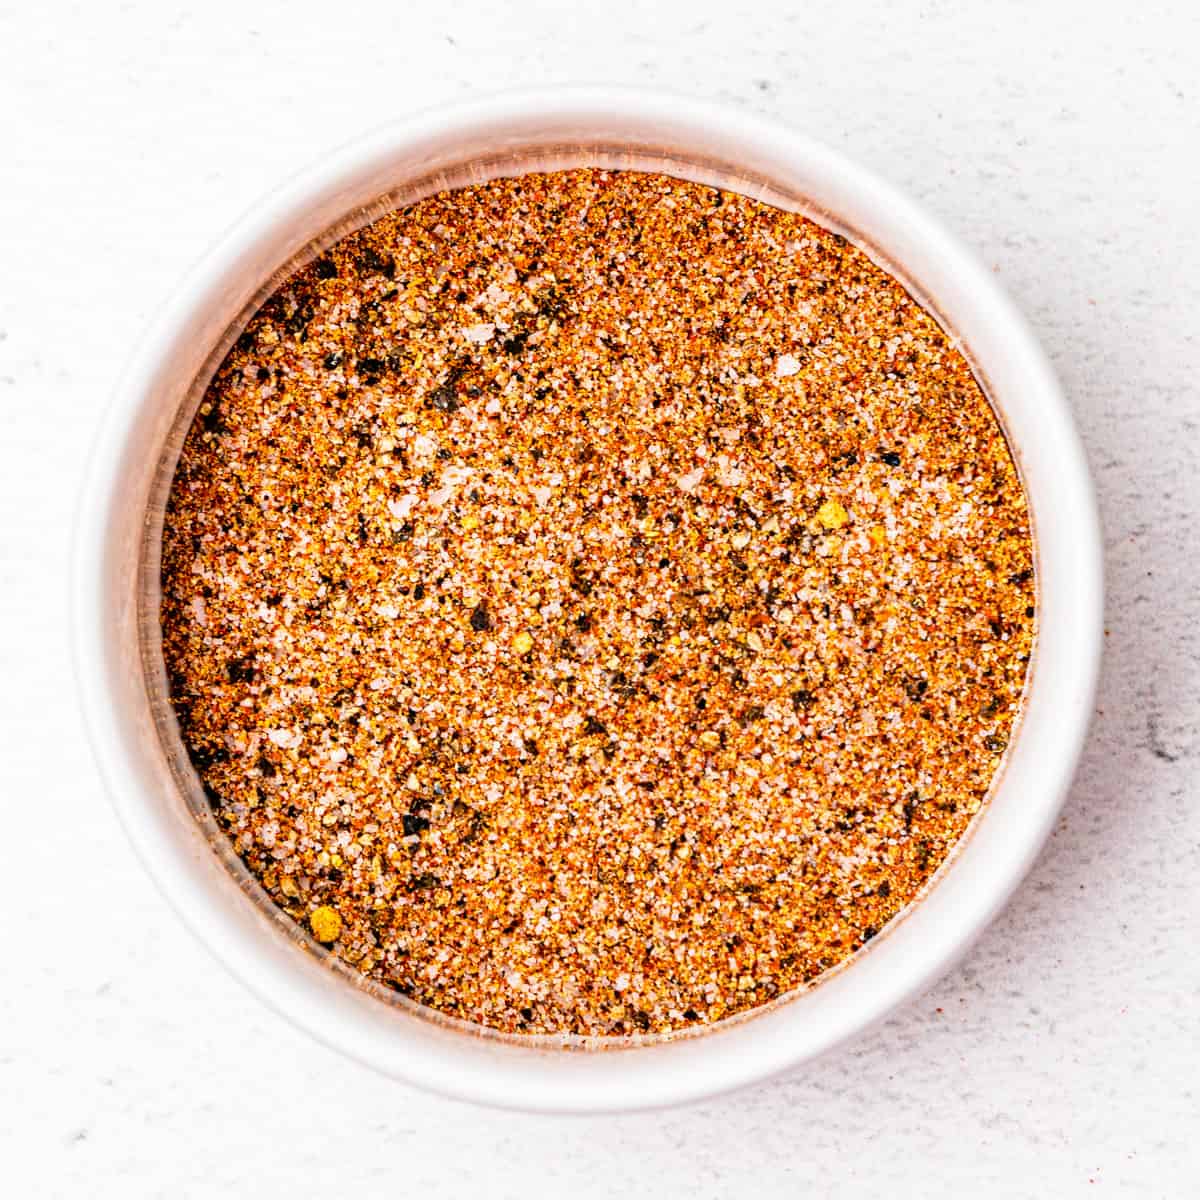
- Dry Rub - This recipe uses a flavorful homemade brisket rub made with common pantry ingredients, but you can substitute your favorite store-bought rub too.
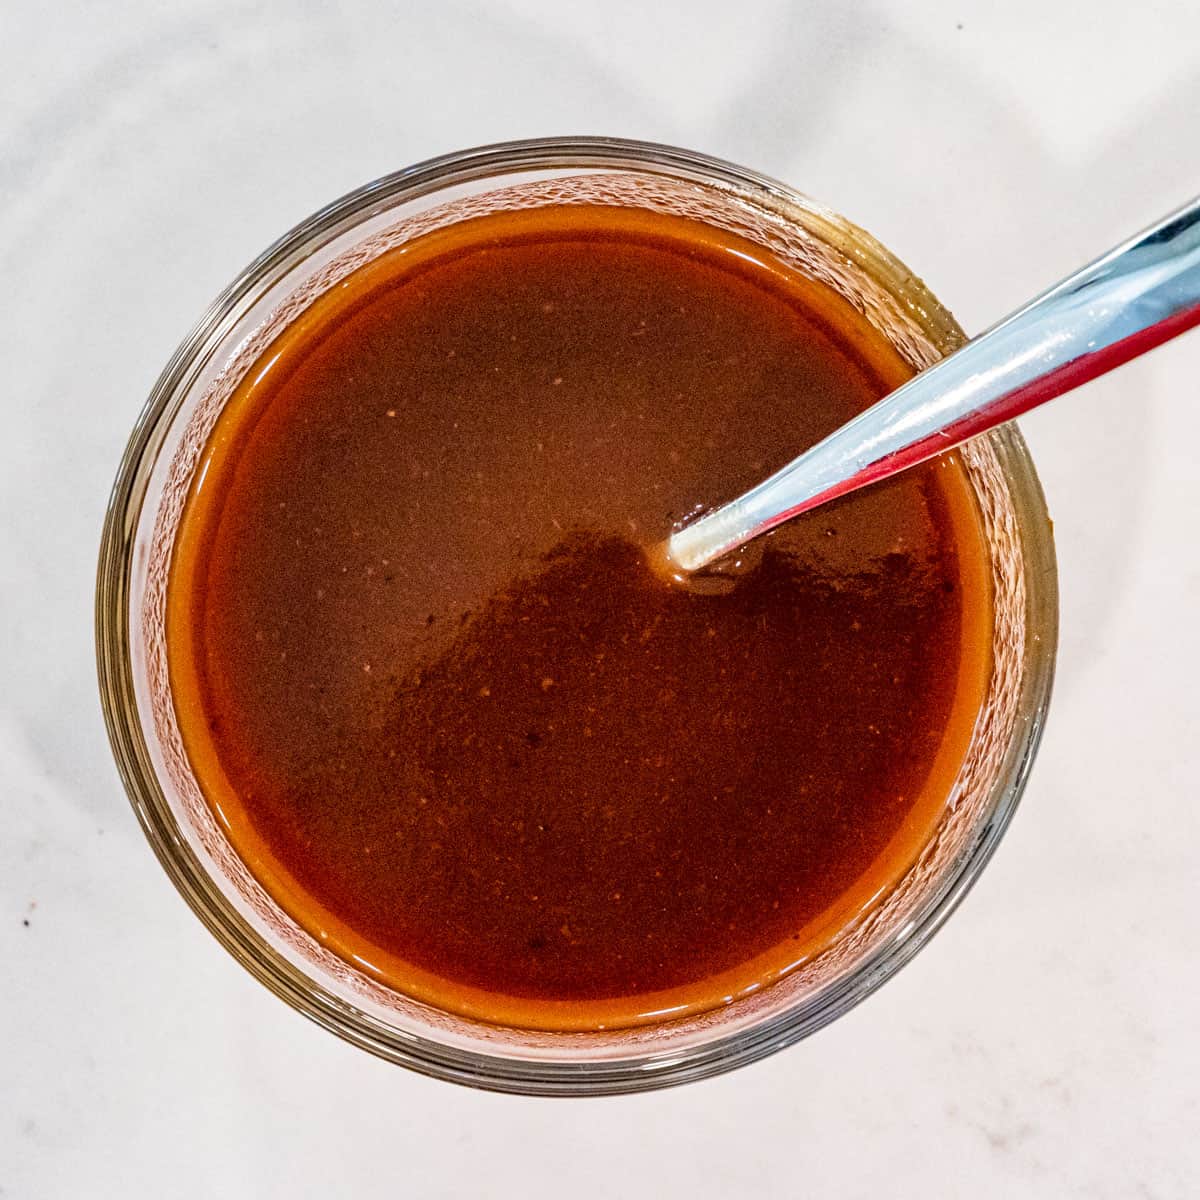
- Barbecue Sauce - The barbecue sauce mixed with beef broth serves as the cooking liquid and adds tons of flavor to the brisket.
See the recipe card at the bottom of this post for the complete list of ingredients and measurements.
Step-by-Step Instructions
- Set the Instant Pot to Sauté mode and allow it to preheat. Add the rub ingredients to a small bowl and stir to combine.
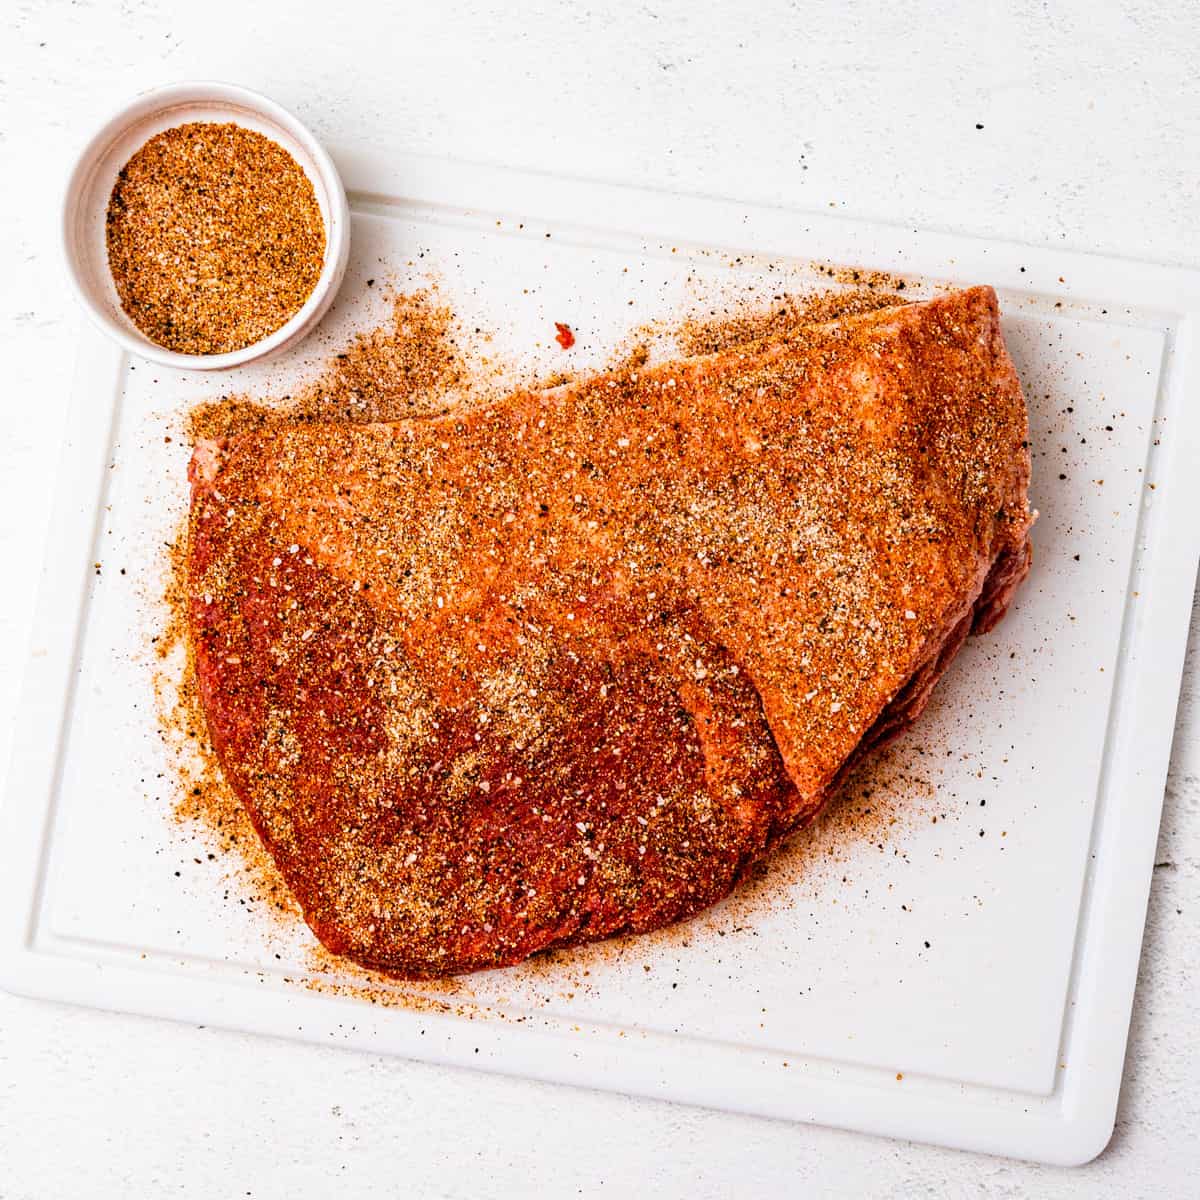
- Trim the brisket to roughly the size of your Instant Pot. It will shrink during the cook, so it can be slightly larger. Trim the fat cap of the brisket to around ¼ inch thick and remove any large pockets of fat and thin edges of the meat. Then, season the brisket liberally on all sides with the rub.
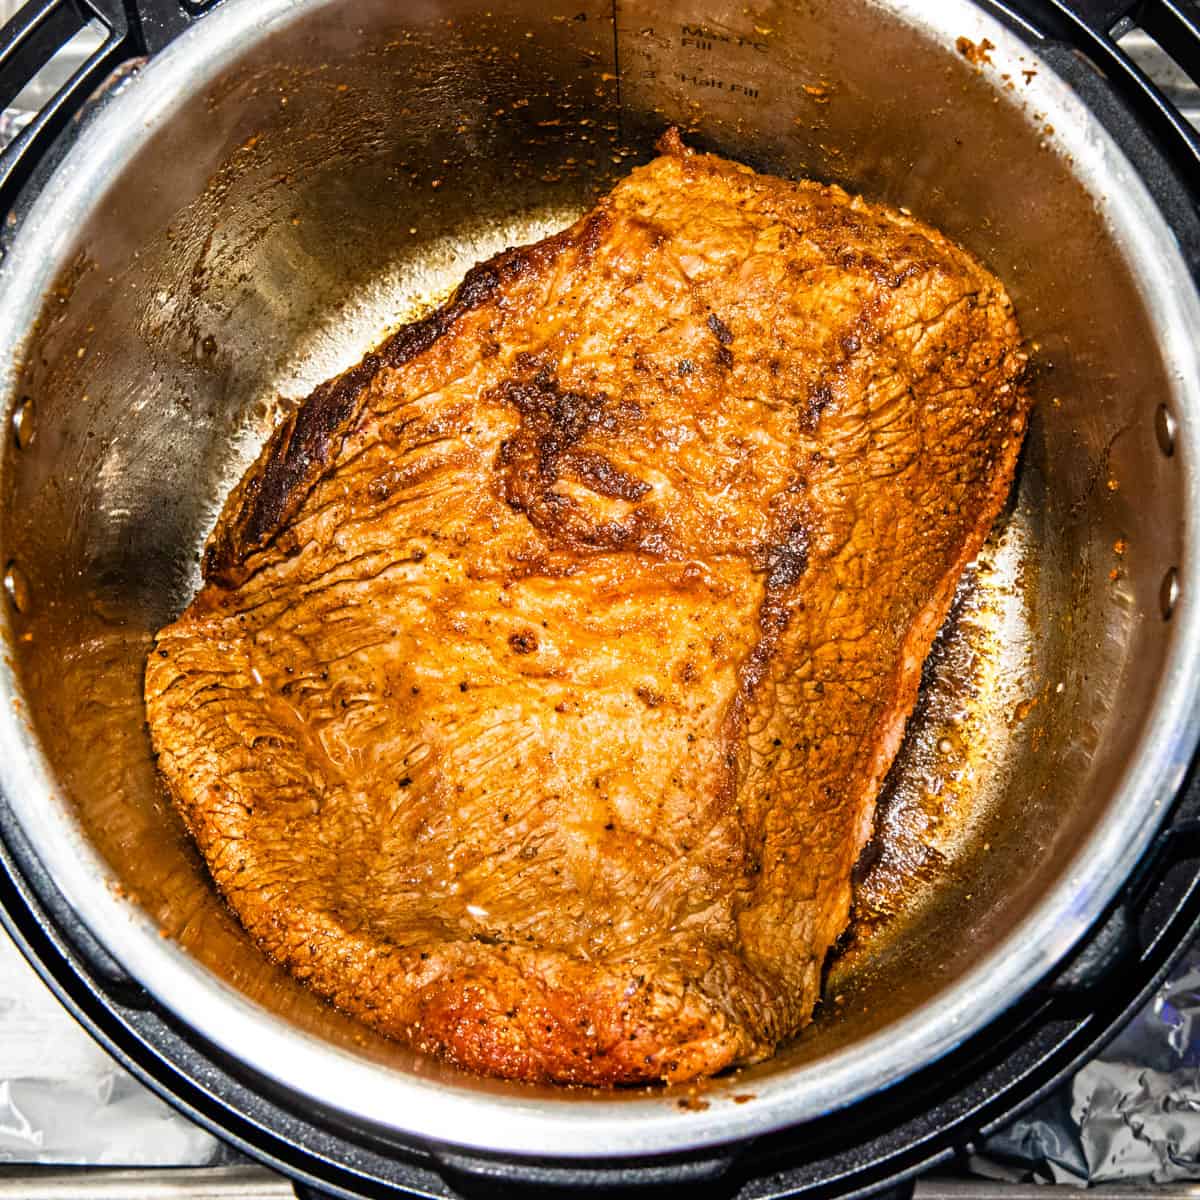
- Add the olive oil to the pot, then add the meat and sear it for 2-3 minutes on each side until it's browned. Transfer the meat to a plate and cancel the Sauté mode.
- Add the beef broth and BBQ sauce to the pot and stir to combine. Thoroughly scrape any brown bits from the bottom of the pot with a wooden spatula or spoon to avoid a burn warning.
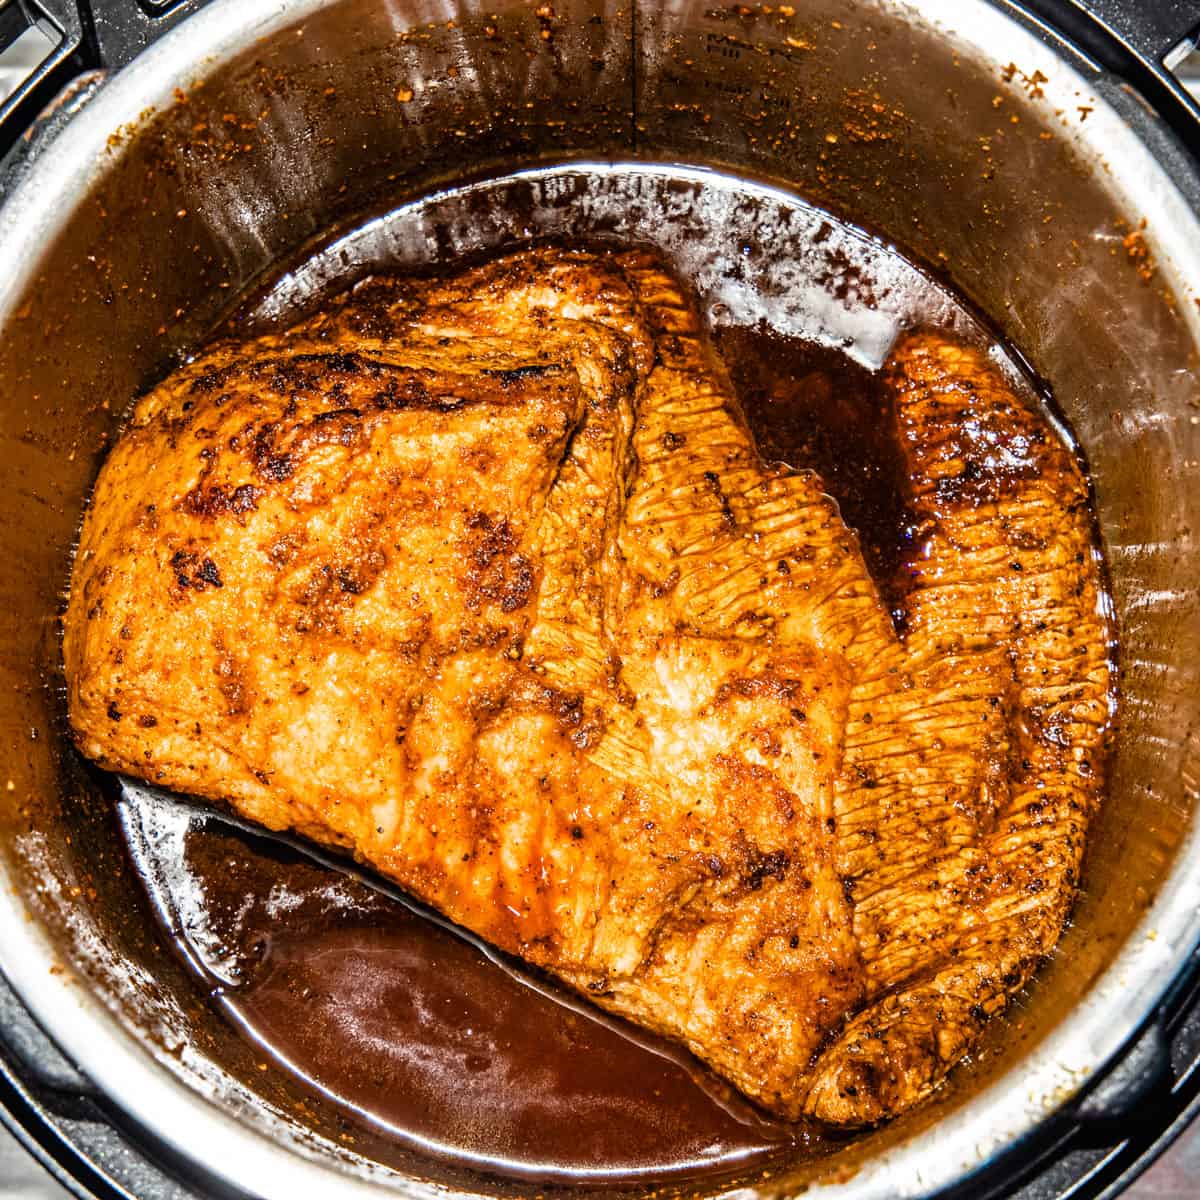
- Add the brisket back to the pot along with any juices that have accumulated on the plate. Lock the lid and cook on high pressure for 75 minutes. Let the pressure release naturally for 15 minutes, then carefully vent any remaining pressure using the quick release.

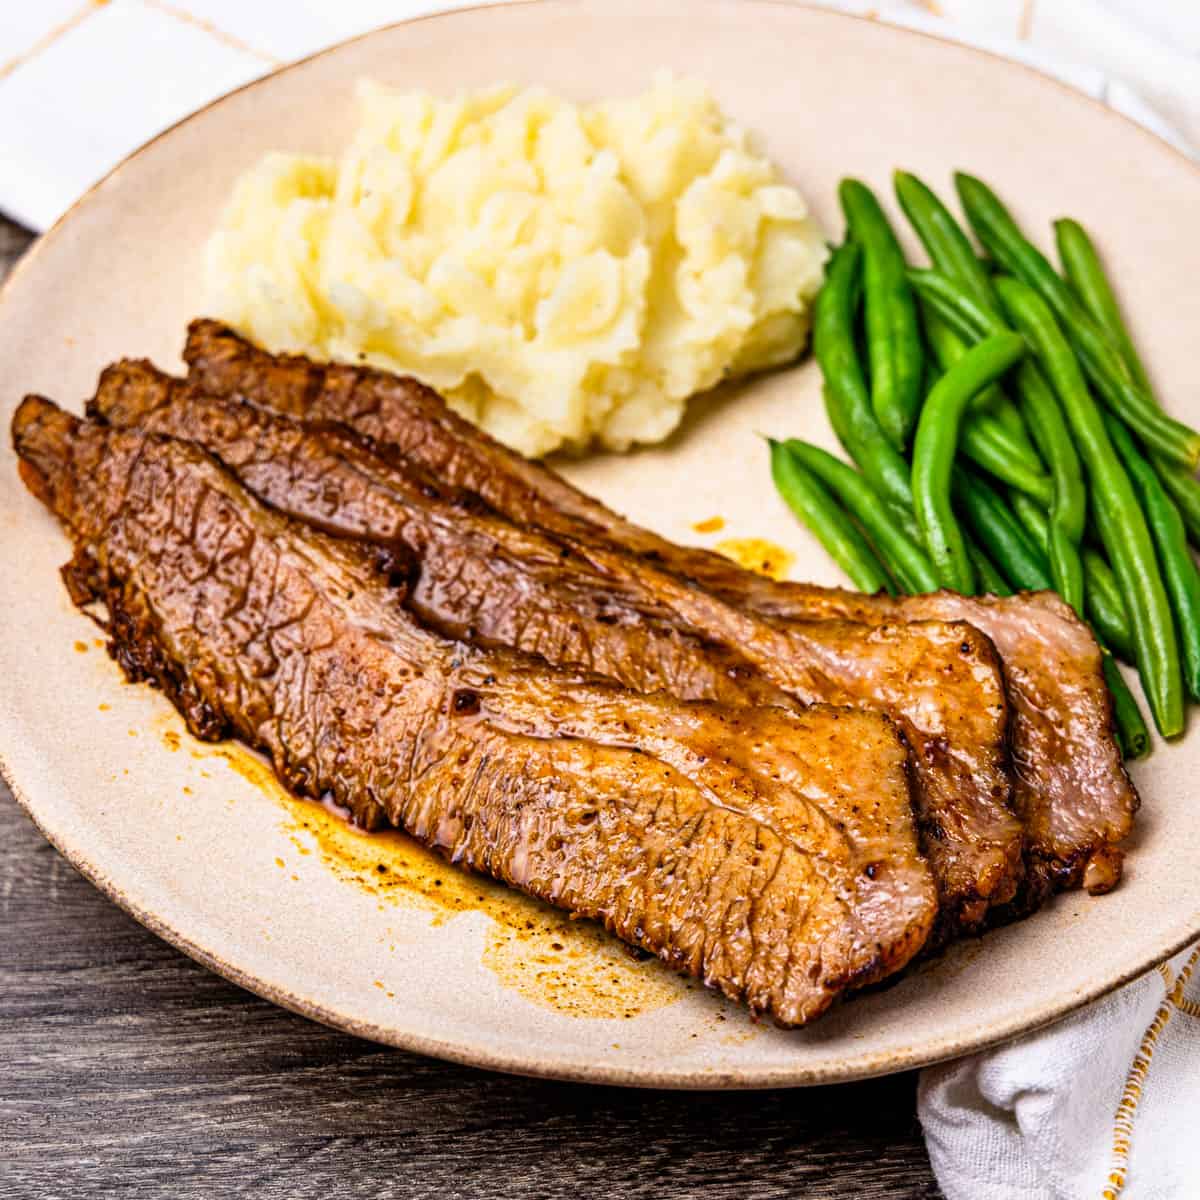
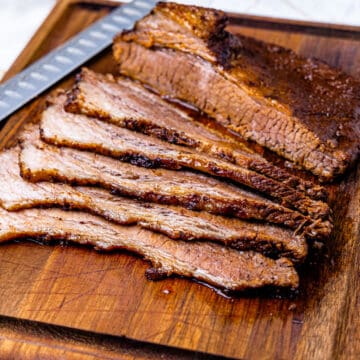
- Using a pair of tongs, remove the brisket from the pot and transfer it to a cutting board. Tent it with foil and let it rest for 10 minutes. Slice the brisket across the grain into thin slices and top with some of the juices from the pot before serving.

Expert Tips
- Using a 15-minute natural release to vent the pressure, then letting the meat rest for 10 minutes before slicing, helps to make the meat more tender and allows time for the juices to reabsorb into the meat so it's moist and flavorful. Do not skip these steps!
- If you want to get a more smoky flavor in your brisket, you can add 2-3 teaspoons of liquid smoke to the cooking liquid.
- To cook a larger piece of brisket, you can cut the meat in half and place the pieces in the pot side-by-side.
- Try to serve the brisket immediately after slicing it, as the thin slices can quickly dry out. Spoon some of the cooking liquid over the slices to moisten them and add more flavor.
What to Serve with Brisket
This pressure cooker brisket pairs well with a variety of side dishes. You can serve it with classic barbecue side dishes like my baked macaroni and cheese, smoked baked beans, and creamy Southern-style coleslaw.
And for an easy holiday meal your guests will love, try it with my Instant Pot garlic mashed potatoes and sautéed garlic butter green beans.
Storage and Reheating Instructions
This Instant Pot Brisket recipe is perfect for leftovers. It makes for some amazing brisket sandwiches the next day! It's also great to use in tacos, chili, and other dishes too.
Store your leftovers in an airtight container with some of the cooking liquids and refrigerate for up to 4 days.
To reheat leftovers, place them in a baking dish with some of the cooking liquids and cover with foil. Heat in a 275°F oven for 10 minutes or until warmed through.
Frequently Asked Questions
Cooking brisket in a slow cooker is a great option, but it will take 8 to 10 hours to cook. You can achieve similar results using an electric pressure cooker in a fraction of the time.
Beef brisket is a tough cut of meat if not properly cooked. It typically requires a long, slow cook to break down the muscle fibers and connective tissue and become tender. By using your Instant Pot to pressure cook brisket, you can reduce this time to under 2 hours.
More Instant Pot Recipes


📖 Recipe
Instant Pot Brisket Recipe
Ingredients
Rub
- 1 tablespoon kosher salt
- 1 teaspoon fresh ground black pepper
- 1 teaspoon paprika
- ½ teaspoon chili powder
- ½ teaspoon onion powder
- ½ teaspoon garlic powder
- ½ teaspoon ground mustard
Brisket
- 1 Tablespoon olive oil
- 3-4 pounds brisket flat
- 1 cup BBQ sauce
- ½ cup beef broth
Instructions
- Set the Instant Pot to Sauté mode and allow it to preheat. Add the rub ingredients to a small bowl and stir to combine.
- Trim the brisket to roughly the size of your Instant Pot. It will shrink during the cook, so it can be slightly larger. Trim the fat cap of the brisket to around ¼ inch thick and remove any large pockets of fat and thin edges of the meat. Then season the brisket liberally on all sides with the rub.
- Add the olive oil to the Instant Pot, then place the meat in the pot and sear for 2-3 minutes on each side until well browned. Transfer the meat to a plate and cancel the Sauté mode.
- Add the beef broth and thoroughly scrape the pot with a wooden spatula or spoon to remove any brown bits. Add the BBQ sauce to the pot and stir to combine.
- Add the brisket back to the pot and any juices from the plate. Lock the lid and cook on high pressure for 75 minutes. Let the pressure release naturally for 15 minutes, then vent any remaining pressure.
- Using a pair of tongs, remove the brisket from the pot and transfer it to a cutting board. Tent it with foil and let it rest for 10 minutes. Slice the brisket across the grain into thin slices and top with some of the juices from the pot before serving.
Notes
Nutrition
* All nutrition information we provide are estimates based on third party calculators. We encourage you to calculate these on your own for accurate results.


Catmk says
Awesome recipe. Made lots of briskets on the grill. Wanted to try the instant pot. Wow! The rub was great, love it says my fav bbq sauce. Sweet baby rays here too. Loved it all will make it over and over and over. Thanks for a great recipe, rub, and awesome time management for it too! Yummy
Lowell W Roemke says
I made this on June 18, 2024 and I was shocked about how good it was. I won't smoke another one again. It is so easy with this recipe. I used Sweet Baby Ray for the BBQ sauce in the Instant Pot.
Lisa says
turned out great